Dried Hydrangea Holiday Mantel From Now Through Christmas
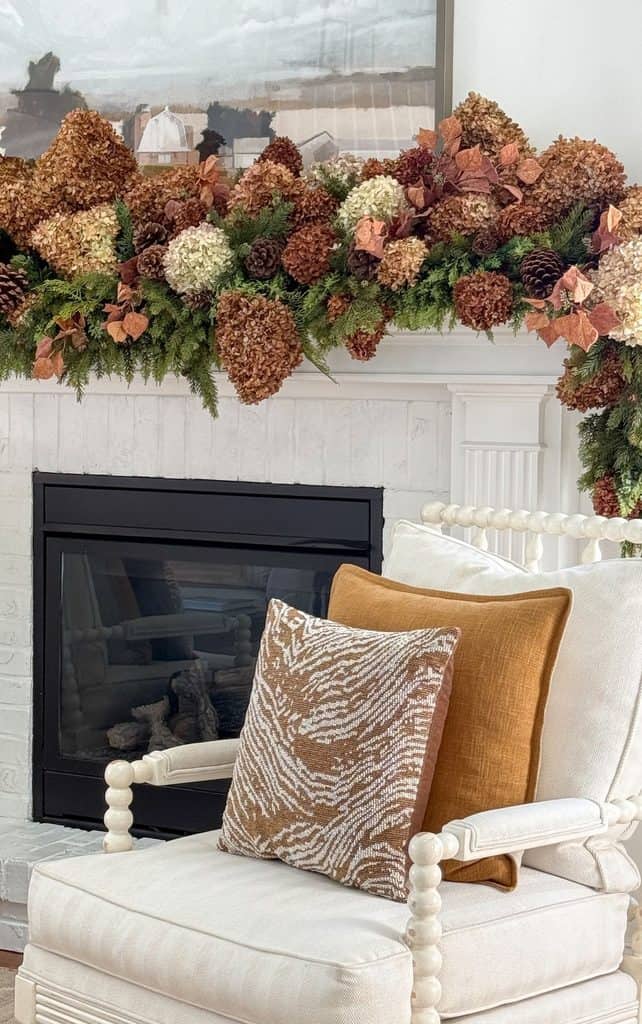
This easy dried hydrangea mantel, layered on a real-touch cedar garland, looks lovely from late fall through Christmas.
An Important Message Before We Begin:
Dear friend,
The day has finally come. After 17 years of blogging, I have decided to step back from the day-to-day responsibilities of StoneGable, but I am not leaving. Every one of those years has been a joy, and you have been one of the biggest blessings of my life. This was not an easy decision, but one that allows me to start a new season of life.
After 50 years of practicing medicine, my husband is finally retiring, and we want to spend this newfound freedom traveling, enjoying our family, and serving our church. I will still be writing posts and answering your comments, so you will still find me here, just a little less often.
As I begin to step back, I would love for you to meet Sue Dhillon, a writer and former network television journalist who is joining StoneGable. She is delightful, and I feel she is the right person to lead StoneGable’s next chapter, with more stories about cooking, decorating, and making a home. She will also invite chefs and interior designers to share recipes and DIY know-how in videos you can follow along. This is very exciting and will keep StoneGable’s content fresh, inspiring, and helpful.
The future of StoneGable is very bright, with many new ideas and the traditions you love always at its heart. Thank you for following along all these years and for being such dear StoneGable friends. I can’t wait to see what comes next, together.
With love and a grateful heart, Yvonne ❤️
Now, let’s decorate a mantel…
For years, I didn’t decorate for Christmas until I’d washed and put away the Thanksgiving dishes. Blogging changed that. Once I started decorating my mantel in November, I saw how festive and beautiful our home looked and felt, and my family and friends love it too!
This year, my hydrangeas were riotous, the happiest they have been in years! They will be front and center in my Christmas decor this year.
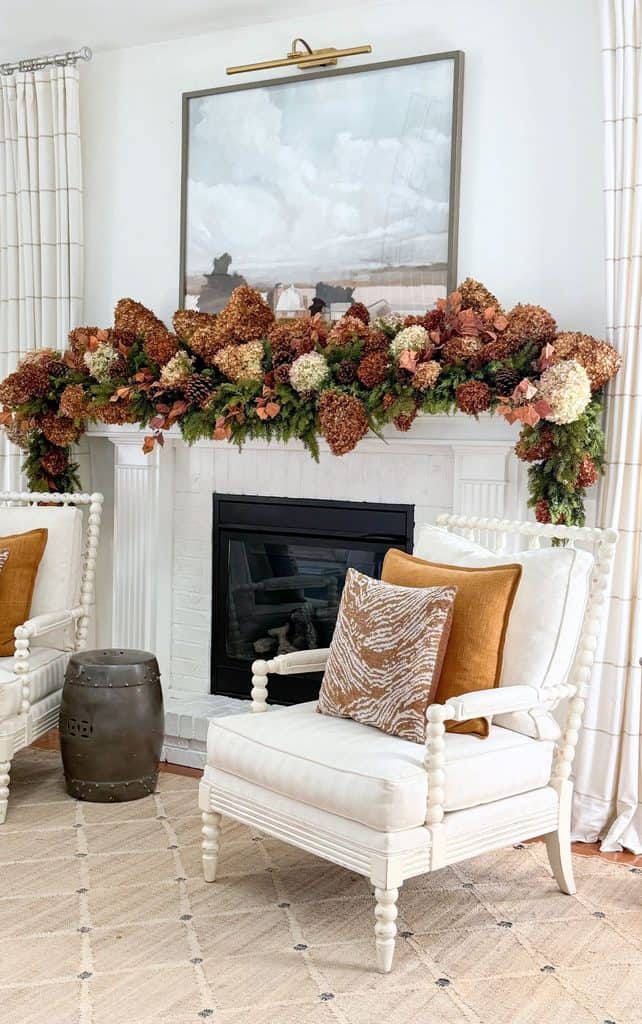
Today I’m sharing how to decorate a mantel, or any long, flat surface, for Thanksgiving, and how I’ll tweak it just a bit so it works for Christmas too.
This post is sponsored by Geegoods, the maker of the cedar garland on my mantel. All thoughts and opinions are my own.
This mantel came together in seven simple steps. A lifelike cedar garland made the foundation, older greens filled in underneath, and dried hydrangeas from the yard built up on top. It looks warm and gathered for late fall and Thanksgiving. After Thanksgiving, a few easy swaps turn the very same mantel into Christmas, no starting over required.
Why A Dried Hydrangea Mantel Works From Late Fall Through Christmas
Evergreens belong to both holidays, so a cedar base never looks out of season in November or December. Dried hydrangeas bring soft harvest colors- beige, warm brown, blush, and a little green- without a single pumpkin. Set against deep green, those dried brown blooms feel rich for Thanksgiving and vintage for Christmas.
That is the beauty of crossholidation. You build the mantel once, then simply edit it as the season changes. It saves time, saves money, and lets you enjoy a pretty mantel for nearly two months.
What You Need For This Mantel
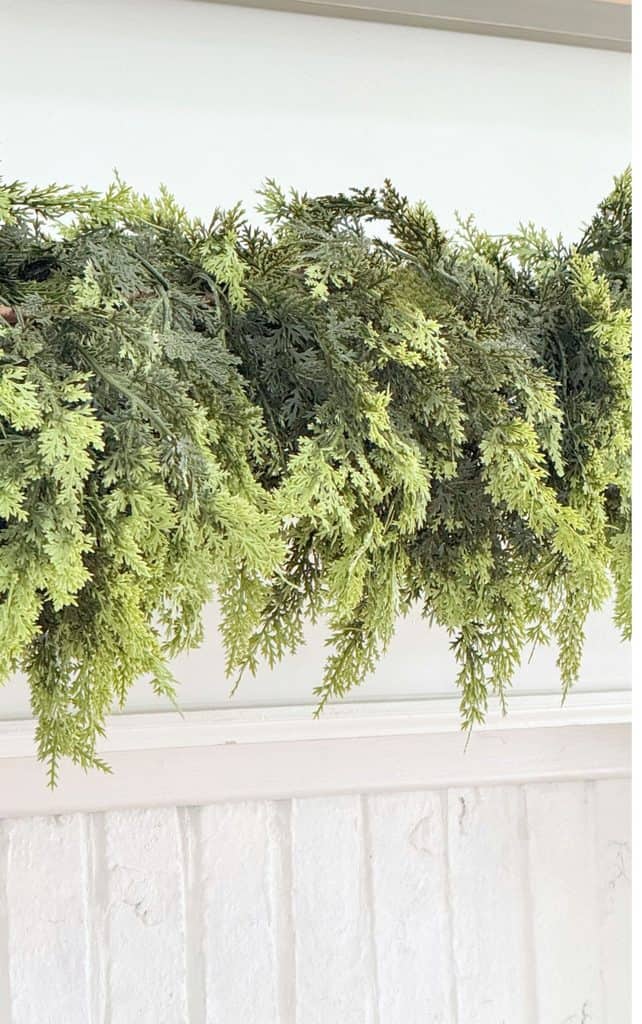
Most of what you need may already be tucked away in your holiday bins.
- Two 6-foot real-touch cedar garlands (here and here) using Yvonne15 for a 15% discount.
- A 5-pack of Command Cord Bundlers
- Old evergreen stems and cut-apart garland
- Dried Limelight and Cotton Candy hydrangeas, real or faux
- Faux leaf branches, cut into smaller pieces
- A handful of pinecones
- Wire cutters
For Christmas, set aside dried red hydrangeas and red berry stems. Or spray-paint hydrangeas you already have in a color that matches your holiday decor.
How To Decorate A Dried Hydrangea Mantel Step By Step
These seven easy steps take you from a bare mantel to a full, layered one.
Step 1: Clean The Mantel
Start with a clean slate. Clear everything off the mantel, then dust the top and wipe down the front edge where the garland will rest. Once you layer on the greens and hydrangeas, you won’t be able to reach underneath, so do it now.
It is also a good moment to step back and look at what hangs above the mantel. Knowing how much space you have makes it easier to decide how tall to build the hydrangeas later. I built up the hydrangeas so it appeared as if you were looking through them to view the farm beyond.
Step 2: Lay An Evergreen Foundation
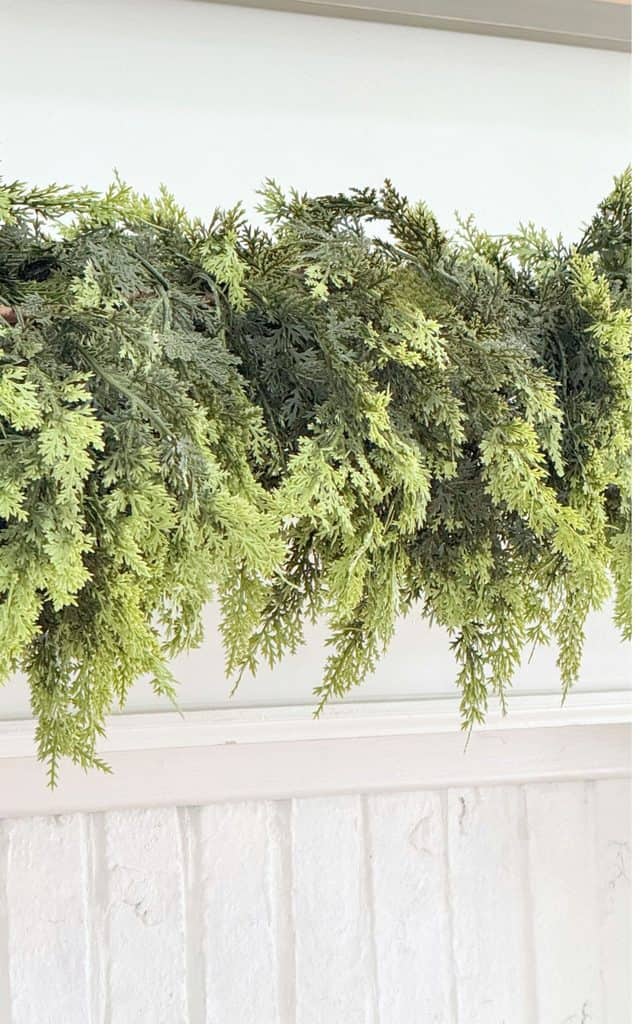
The cedar garland is the foundation for everything else, so it goes on first. This real-touch cedar garland is so lifelike, with variegated color that blends soft chartreuse with deeper green. The garlands are beautifully made, and I really love them. A big thanks to Geegoods.
Join Two Garlands Together
Each garland is 6 feet long, and my mantel is longer, so I joined two. Tie one end of the first garland to one end of the second, right in the middle of the mantel. That way, the two finished ends fall over each side of the mantel, and where they join hides under the greens and hydrangeas. Measure your mantel first, and if it runs past 6 feet, plan on two garlands.
Secure It With Cord Bundlers
To get that soft, cascading look, the garland needs to drape over the front edge of the mantel and stay put. Command Cord Bundlers hold it in place. I attached a 5-pack along the mantel, spaced evenly, then secured the cedar garland into each one so it falls gently over the edge. They peel off cleanly after the holidays, so your mantel won’t be damaged.
🌿 TIP BOX: Fluff every branch of a new garland before it goes up. Bend some tips down over the front edge and others back toward the wall so it looks gathered, not flat.
Step 3: Add More Greens To Cover The Mantel
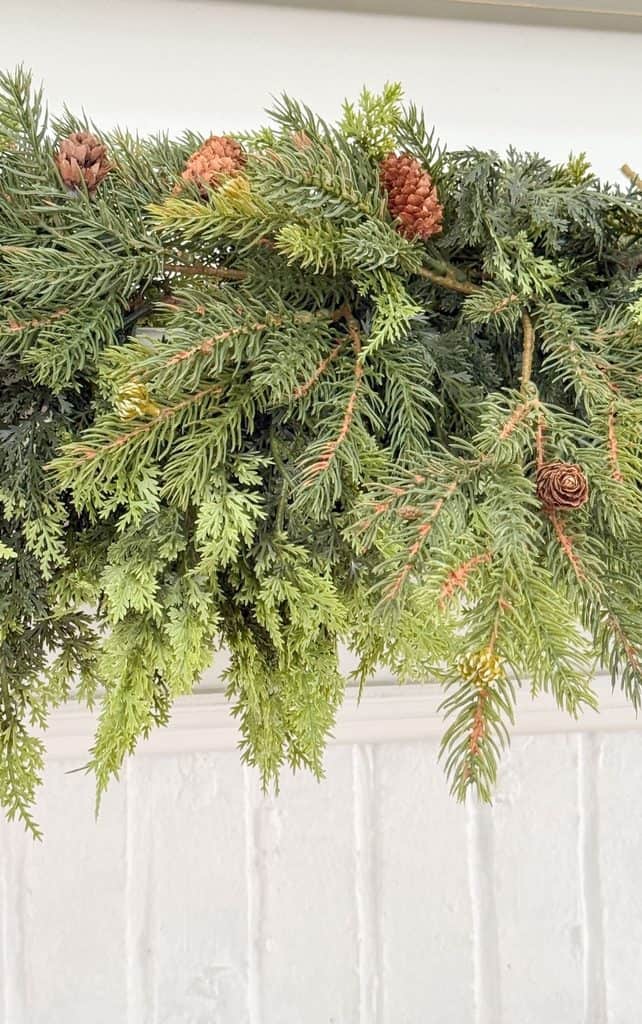
Next, add more greens to the cedar garland and behind it so the whole mantel top is covered in green. I use old stems and pieces of garland I’ve cut apart over the years. The greens behind the cedar won’t be seen; they don’t need to be pretty.
Lay them down to make a nice, thick base from the front edge to the wall. This layer gives the hydrangeas something to rest in and keeps any bare mantel from peeking through. If you need ideas for reviving older stems, my post on using faux greens walks you through it.
Step 4: Adding Dried Hydrangeas
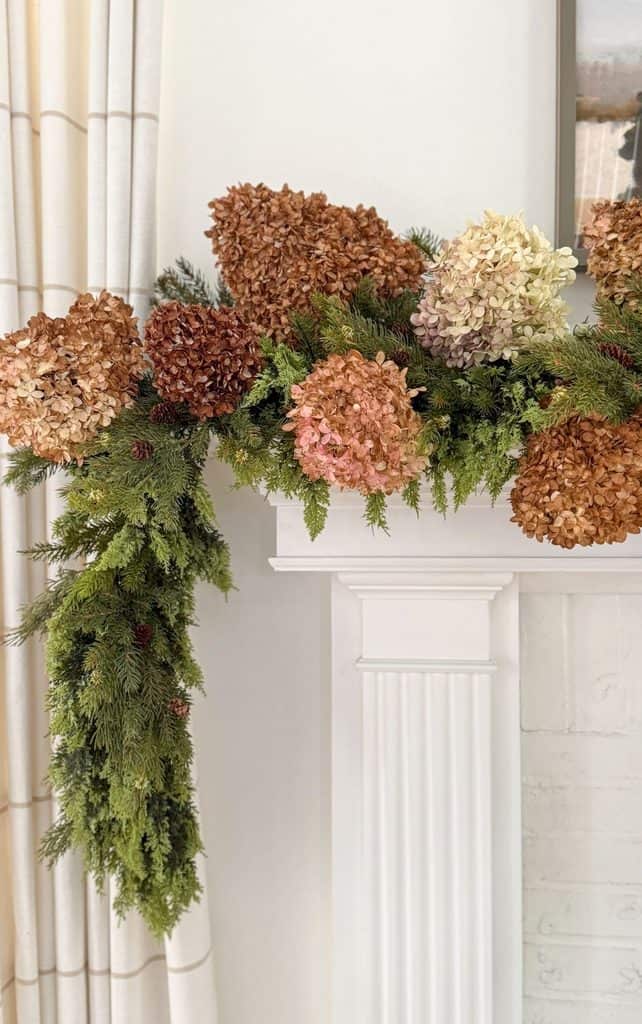
Here is where the mantel comes to life. I used two kinds of dried hydrangeas from our yard, Limelight and Cotton Candy. I wanted the Limelight blooms to be mostly variations of brown and beige, then added a few green hydrangeas I picked last year.
Cut each stem a few inches long and remove all the leaves. Begin at the front, right where the cedar garland lies, and push each stem into the greens so the bloom sits snug. Add hydrangeas so they drape over the edge of the mantel, and point them in different directions. Then work backward toward the wall, building the hydrangeas as you go. The back of the arrangement should be taller than the front, which gives the mantel lovely depth.
Mix the colors as you work so the overall look of the mantel has a variegated appearance.
🌿 TIP BOX: Cut the hydrangea stems to about 6 inches before you start. Thesetems tuck deep into the greens and stay put.
Step 5: Tuck In More Hydrangeas, Greens, And Leafy Branches
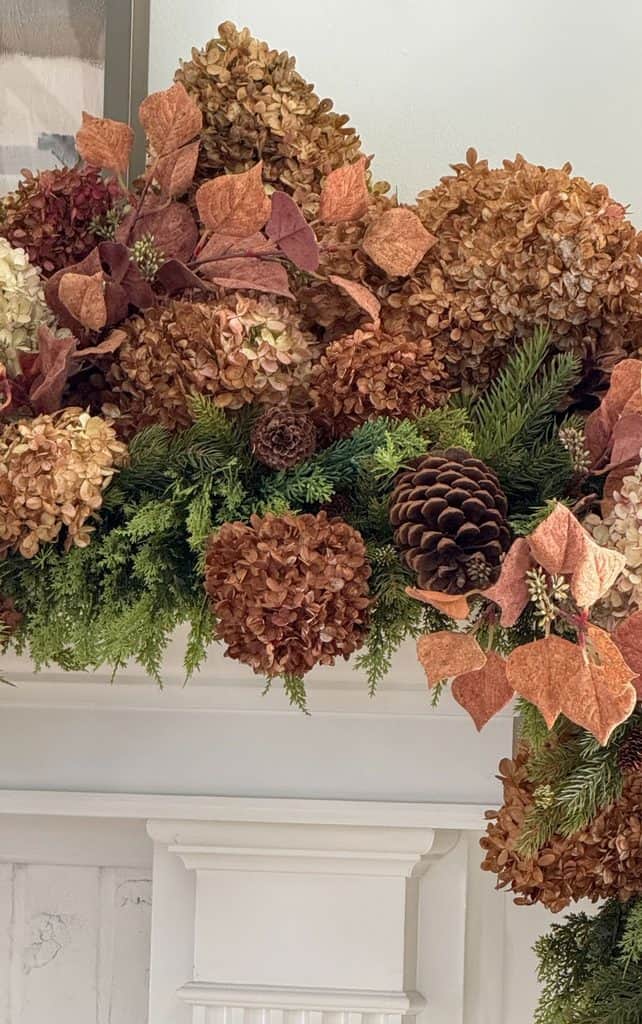
Once the initial hydrangeas are in place, go back and tuck more hydrangeas, then more greens and small leaf branches, between the blooms. This softens the edges of each hydrangea and keeps the arrangement from looking like a row of flowers. A few rusty leaf stems spilling over the front edge add gentle movement.
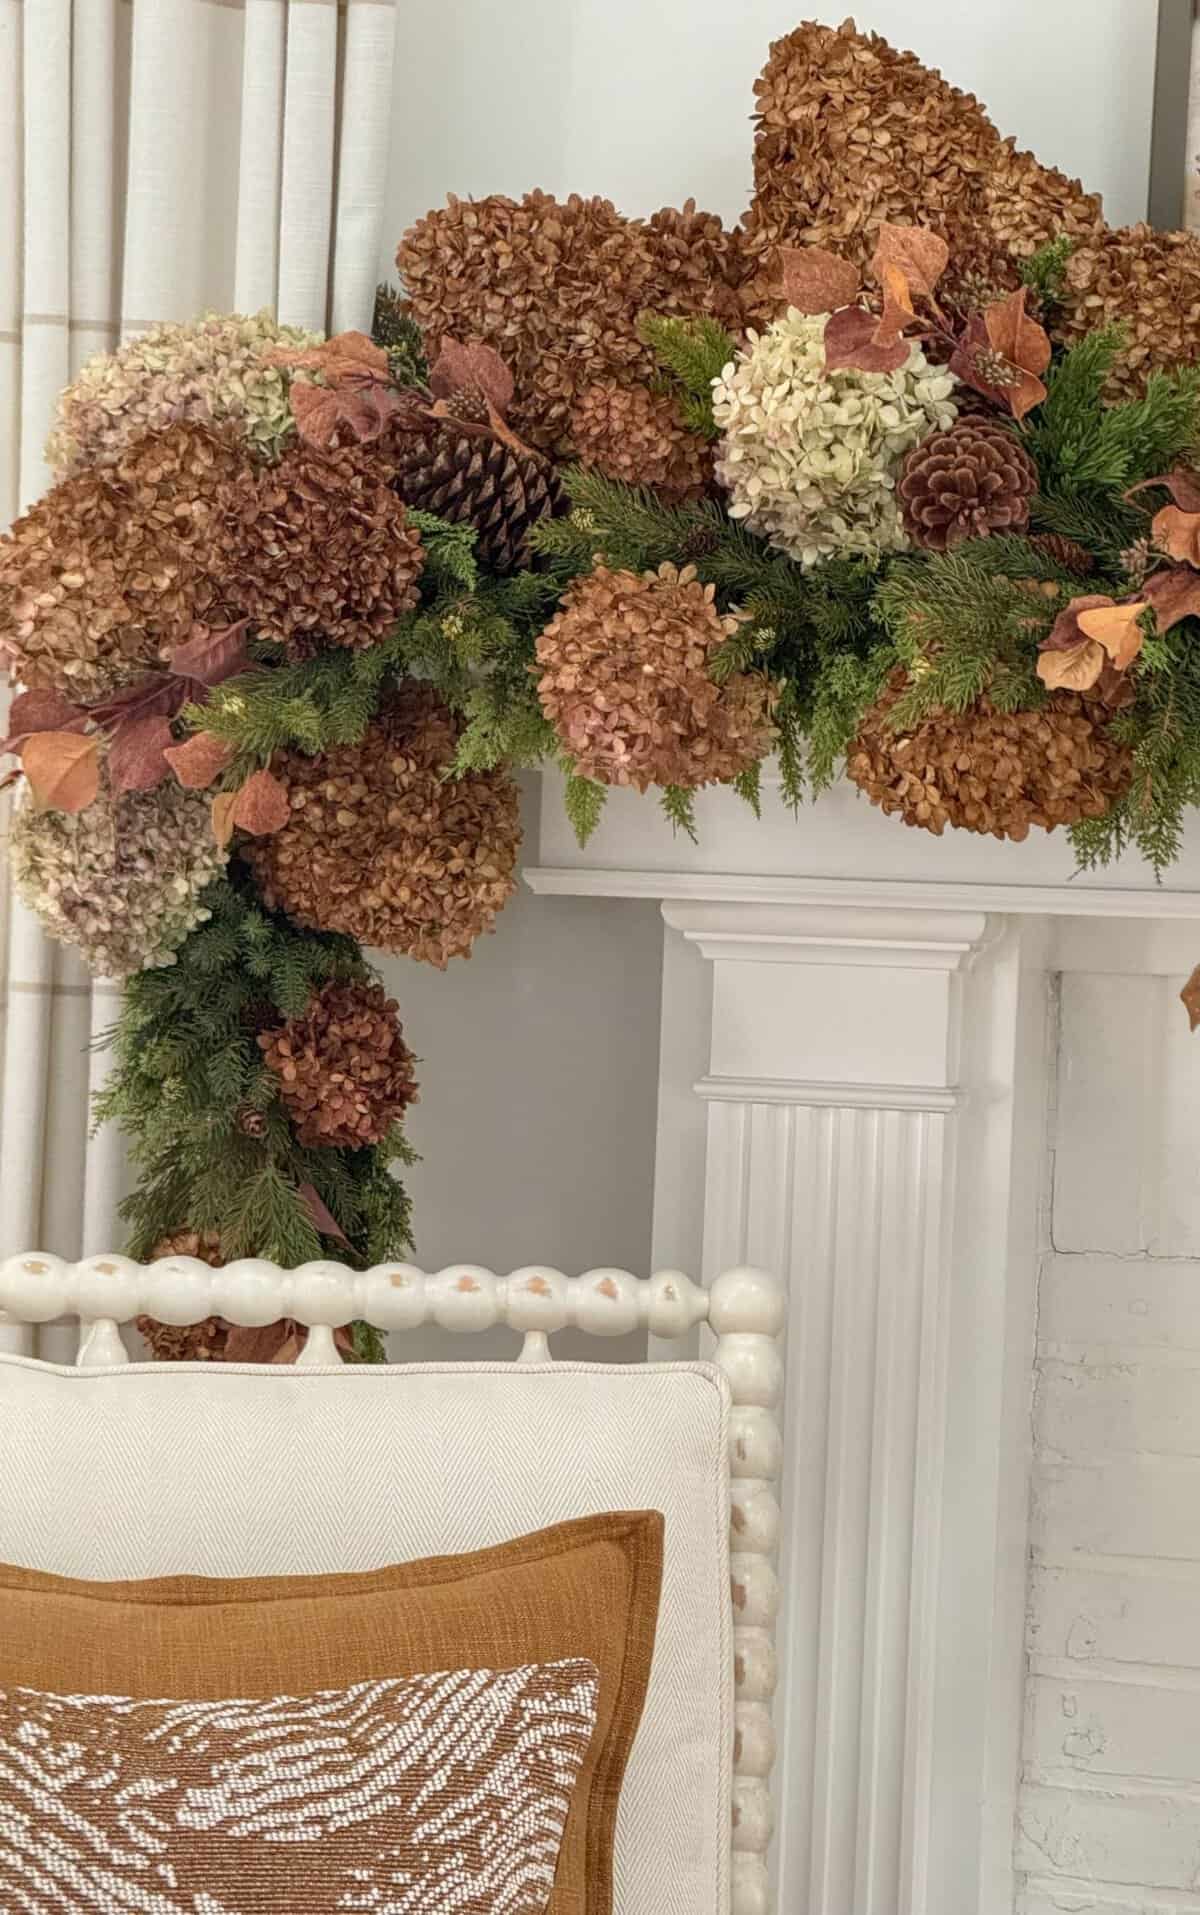
I’ve had all of these pieces for years. I just keep cutting apart old garlands, branches, and stems to use in new ways, and you can too. A single long branch can give you a dozen small pieces.
🌿 TIP BOX: Before you toss a worn garland or tired faux stem, cut it apart with wire cutters. The small pieces make perfect filler for mantels, wreaths, and centerpieces.
Step 6: Tuck In A Light Layer Of Pinecones
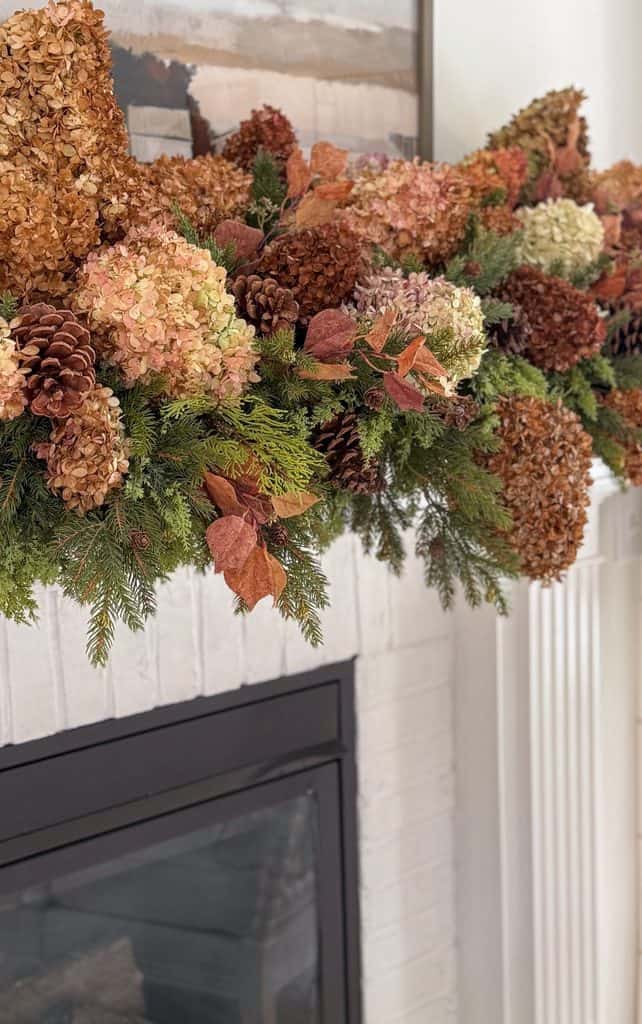
Pinecones add a woodsy texture that suits both holidays. For late fall and Thanksgiving, keep it light. I only add pinecones in obvious spots that need a bit of fill, so the hydrangeas stay the star.
Step 7: Give It A Final Fluff
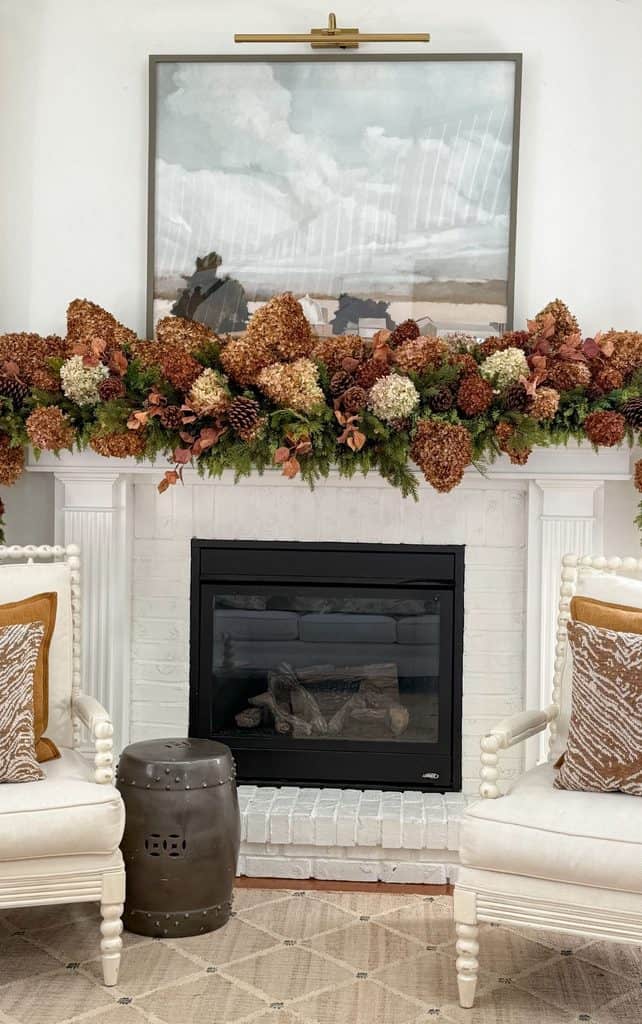
Walk to the other side of the room and look at the mantel as a whole. Look for any spot with a hole or an area that isn’t quite balanced, then fix it with another sprig of green, a leaf, or a bloom moved a few inches. A slightly uneven, gathered look is lovely, so there is no need for perfect symmetry.
Fireplace Safety Tip: Dried flowers and faux greens can burn, so keep every bloom well above the firebox opening and use battery fairy lights instead of real candles in the garland.
How To Turn Your Thanksgiving Mantel Into A Christmas Mantel
Once Thanksgiving is over, leave the cedar, greens, and most of the hydrangeas where they are. A few simple swaps bring in Christmas red, and fairy lights add the glow.
Swap In Dried Red And Pink Hydrangeas
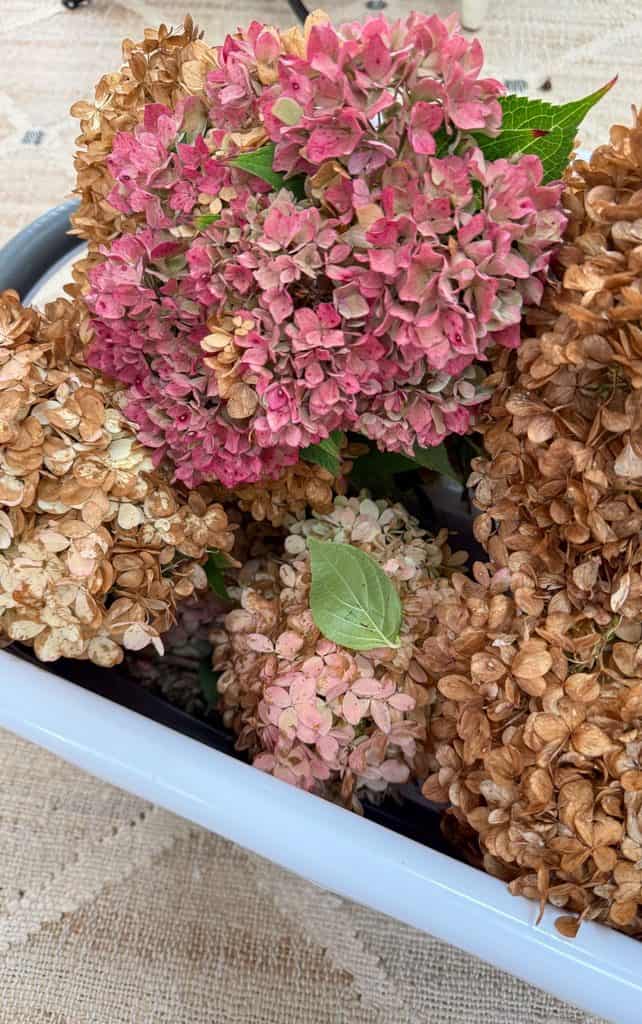
Pull out some of the brown hydrangeas and tuck dried red and pink hydrangeas into their spots. Keep the beige, blush, and green blooms in place, so the red feels mixed in rather than lined up in a row.
Take Out The Leaves
The rusty leaf branches belong to fall, so remove them. That small edit changes the whole feel of the mantel and leaves room for the berries.
Add Red Berries
Tuck red berry stems into the spaces the leaves left behind. Let a few berry sprigs spill over the front edge, the same way the leaves did, to keep that gentle movement.
Weave In Fairy Lights
For late fall, the mantel goes without lights. After Thanksgiving, fairy lights are the finishing piece that makes it feel like Christmas. Choose tiny lights on thin wire and tuck the strand deep into the cedar so it glows from within, rather than laying it on top.
Battery fairy lights with a built-in timer are the easiest choice. Hide each battery box under the greens at the ends of the mantel, and the mantel glows every evening on its own.
If you want help settling on colors, my post on choosing a Christmas color palette makes it easy.
Questions You May Ask About A Dried Hydrangea Mantel
Here are the questions that come up most about decorating a mantel with dried hydrangeas. I hope these answers help you build yours with confidence.
Can You Use Dried Hydrangeas For Christmas Decorating?
Yes. Dried hydrangeas look lovely with evergreens, fairy lights, and glass ornaments, and their soft colors give a Christmas mantel a garden feel. Swap some brown blooms for dried red hydrangeas for a sweet way to keep enjoying your summer blooms through December.
How Long Do Dried Hydrangeas Last Indoors?
Well-dried hydrangeas can last a year or more indoors when kept out of direct sun and humidity. Handle them gently, and they will be ready to use again next fall.
How Do You Keep Dried Hydrangeas From Shedding?
A light, even mist of hairspray or floral sealant helps hold the petals in place. Spray them outdoors and let them dry completely before they go on the mantel, and you’ll find far fewer petals on the hearth.
How Do You Attach Flowers To A Mantel Garland?
Cut the stems to about 6 inches and push them deep into a thick bed of greens so the blooms stay put. Step 4 above shows how to work from front to back.
Is It Safe To Put Dried Flowers On A Mantel Above A Fireplace?
Dried flowers and faux greens are flammable, so keep them well above the firebox and away from open flames. Follow your fireplace maker’s clearance guidelines, and choose battery lights for the garland so you can enjoy it worry-free.
When Should You Decorate Your Mantel For Christmas?
Many people decorate the weekend after Thanksgiving, but you can put up a mantel built with evergreens and dried hydrangeas in early November. Simply swap in red hydrangeas and berries when you are ready for Christmas, and the mantel grows with the season.
A lifelike cedar garland, a handful of older greens, and blooms from your own yard make an easy mantel that carries you beautifully from late fall to Christmas. Build it once, enjoy it all through November, and let red hydrangeas and berries welcome Christmas when the time comes.
Happy holiday decorating, friend!


I will miss having coffee with you each morning! You were the very first blogger I started following and over the years, I have copied many of your ideas throughout my home. Enjoy this next season of your life!
You can still have your morning coffee with Susan and me! StoneGable is not going anywhere, friend
Yvonne I have followed you for years, and have saved every one of your posts. I enjoy going back looking at them, and I admire your decorating style as well as your recipes! I don’t blame you for stepping back, and I appreciate that you will still be here from time to time, and also look forward to seeing what Sue has to offer. Enjoy your travels! xo
Thanks so much, Maryann. StoneGable’s best days are in front of it.
I will miss your daily posts, and I hope you continue to post your Sunday devotionals. I look forward to reading those.
I am still writing Sunday Scriptures and some seasonal posts as well. Susan, at the head, is going to be doing some very exciting things.
Wow!! A surprise but congratulations on your new chapter! I hope you and your husband get to enjoy the fruits of the many years spent “doing” for others. God bless you, your family, and this next chapter. Appreciated you especially on Sundays!!!
Thanks, Melanie. I’m still writing Sunday Scriptures for the blog.
Dear Mary, I too will miss spending my first cup of coffee time with you! You have inspired and taught me much about using what I have, keeping simple color palettes, and moving through the seasons with ease. I have often shared your Sunday blog with my husband for it has such rich application. We are at a similar season in life, my husband retired last year. We moved south since my health doesn’t allow me to travel well, but I am so happy for you to have this season with your husband to travel, spend time with family, and serve the Lord with joy.
Blessings,
Shelley Welch
I’m sure you will LOVE all the plans Susan has for the blog. I’m still writing Sunday Scriptures.
Such an exciting time for you and Bobby! Sending prayers for multiple blessings to follow along with you as you make new memories in your new adventures.
Thank you, Tammy! I’ll still be around!
I will miss you Yvonne. Your blog was always a bright spot in my day. Thanks for sharing your home decor and cooking advice. I’ve learned a lot from you! Enjoy your next chapter!
Hi Rose, StoneGable is not going away, and neither am I. I’m just stepping back a bit, and there will be a very bright and helpful future for StoneGable. I’m writing Sunday Scriptures and season decorating.
Thank you so much for all the information and joy you have brought through this blog. I also deeply appreciate you modeling a deep and genuine love for God. I know he will bless you in this next chapter of life.