How To Make A Christmas Wreath Using What You Already Have
Turn an old wreath into a fresh Christmas wreath using what you already have with this easy Christmas wreath DIY.
This post may contain affiliate links. See my disclosure statement for details.

Christmas wreaths are one of the prettiest things to decorate with this time of year, but you do not need to buy something new to create a beautiful one. This simple Christmas wreath DIY shows how to start with a wreath you already own, add a few faux greenery snippets, and create a full, pretty wreath for your home.
Years ago, I learned this method at a wreath workshop, and it completely changed the way I decorate for Christmas. I began taking old wreaths from my basement, adding greens and embellishments I already had, and making something new again. It is so easy and gives me a wreath that works with the look I am using in my home each year.
Why This Christmas Wreath DIY Works
A Christmas wreath is one of the easiest things to update, especially when you start with something you already have. This simple method lets you create a full and pretty wreath without spending much or needing special skills. It is an easy way to make something fresh that works with your Christmas decor this year.
A Simple Way To Reuse What You Already Have
Using a wreath you already own is a smart and easy way to decorate for Christmas. You can refresh an older wreath, remove what you no longer want, and add pretty greenery and embellishments to give it a brand new look. It is a wonderful way to create something special without buying a new wreath.
A Budget-Friendly Christmas Decorating Idea
This DIY lets you reuse items you already have on hand. Small pieces of faux greenery, pinecones, berries, and leftover embellishments work beautifully. It is a great way to create a full, lush wreath without spending much at all.
What You Will Need
You only need a few simple things to make this Christmas wreath DIY. Most of them might already be in your Christmas bins or craft rooms. Gather everything first so the wreath comes together easily.
Choosing A Wreath Base
Start with a wreath you already have. An older wreath with tired or sparse greens is perfect for this project because it gives you a ready made base to build on. You can also use an inexpensive wreath to refresh if you do not have one. The size does not matter. Just choose one that fits where you plan to hang it.
I used an old fall wreath that already had a few evergreen snippets in it. It was a bit worn, so I trimmed out the orange eucalyptus leaves and used the fall wreath as the base for my new Christmas wreath. Working with something I already had made this project simple and quick.
Faux Greenery And Little Embellishments

Small pieces of faux greenery are the secret to creating a full and pretty wreath. A mix of pine, cedar, fir, eucalyptus, and little snippets you may have saved from other projects works well. Pinecones, berries, small ornaments, or leftover leaves also make lovely embellishments. A mix of evergreens and other items will give you a beautiful, layered look.
Helpful Tools For This DIY
A few basic tools make this Christmas wreath DIY easy to put together.
- A hot glue gun
- Glue sticks
- Small wire cutters
- Floral wire, optional
- Scissors, optional
- Handheld vacuum
How To Make A Christmas Wreath Step By Step
Now that everything is gathered, the fun begins. This easy step-by-step process shows how to take a tired wreath and turn it into a full, pretty wreath for Christmas.
Add A Layer Of Greenery

Start by adding small pieces of faux greenery around the wreath. Tuck each piece deeply into the base, then secure it with hot glue. This creates a soft first layer that begins to cover the original wreath.
Build A Full And Pretty Wreath
Continue adding more greens, overlapping and layering as you go. Press each stem firmly into the base and glue it in place. Keep working until you see the wreath filling in and looking full.
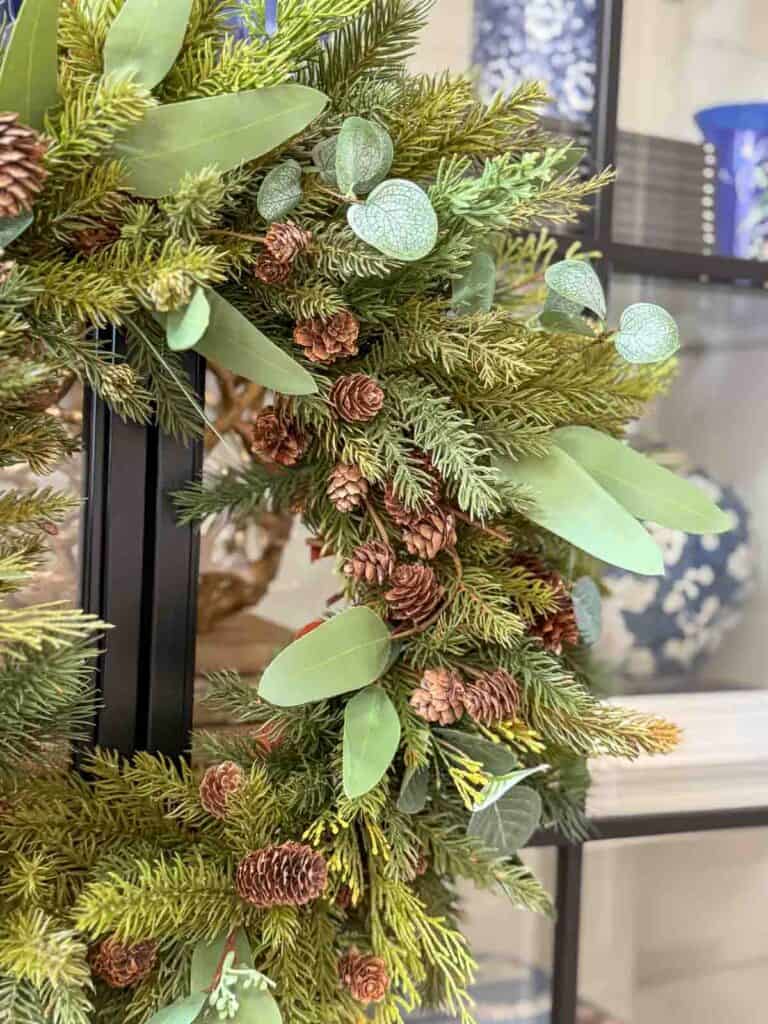
As I made my wreath, I kept adding different kinds of evergreen snippets I had collected over the years until the wreath looked full and symmetrical. Once the greens were in place, I tucked in two types of faux eucalyptus for extra texture and interest. These little additions made the wreath feel richer and more natural.
Wreath-Making Pro Tip
Add greenery at different angles for a natural, full look. When all the stems face the same way, the wreath can look flat. Varying the placement gives your wreath depth and helps it look lush.
Trim Back Any Extra Leaves
If your wreath has elements you do not want to keep, snip them off now with wire cutters. Trim only what you no longer want so the greenery becomes the focus. Save any little pieces to use on smaller wreaths or other Christmas projects.
Finishing Your Christmas Wreath

This is the part that brings everything together. A few little additions make your wreath look full, finished, and ready to hang for Christmas.
Add Pinecones, Berries, And Other Embellishments
Look over your wreath and fill in any thin spots with small pieces of greenery. Then add little embellishments like pinecones, berries, or small ornaments. A few well-placed pieces give your wreath a pretty and balanced look.

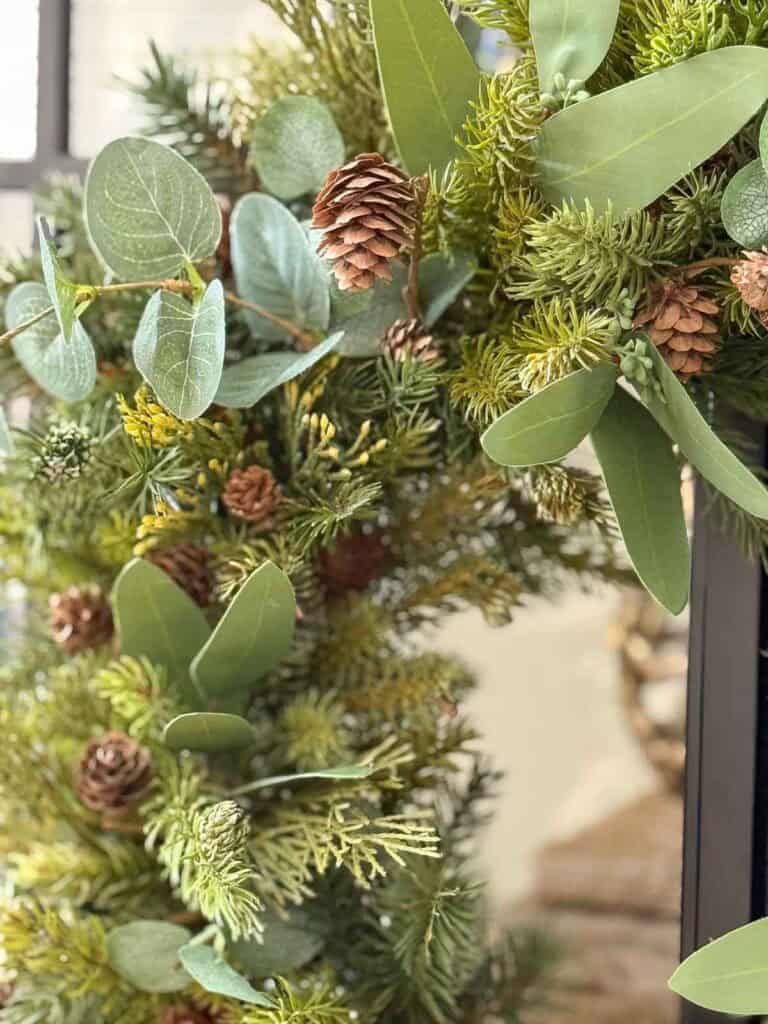
When I made this wreath, some of the faux evergreen stems already had pinecones attached, so I worked with what I had. I tucked those pieces into the spots that needed a little more texture, then added a handful of tiny pinecones to finish the look.

I also dotted the wreath with tiny Christmas ball ornaments to show how a wreath can take on a more festive look with just a few little additions. It is an easy way to add a bit of sparkle without overwhelming the greenery.
Pro Tip: How To Get Rid Of Hot Glue Strings
Those tiny glue strings can make a wreath look messy. A quick way to remove them is to use a hairdryer on a low setting. Hold it several inches away and gently warm the wreath. The glue strings melt and disappear without loosening the glued pieces.
Easy Ways To Hang And Use Your Christmas Wreath
A Christmas wreath is one of the most versatile decorations in your home. Once your wreath is finished, here are a few simple ways to use it throughout the season.
The Best Places To Hang A Wreath

To hang my wreath on the glass doors of our bookcase, I looped florist wire around the base of the wreath so the small knobs would catch the wire. It was an easy way to secure it, and the wreath looked right at home on the doors.
Use It As A Candle Ring
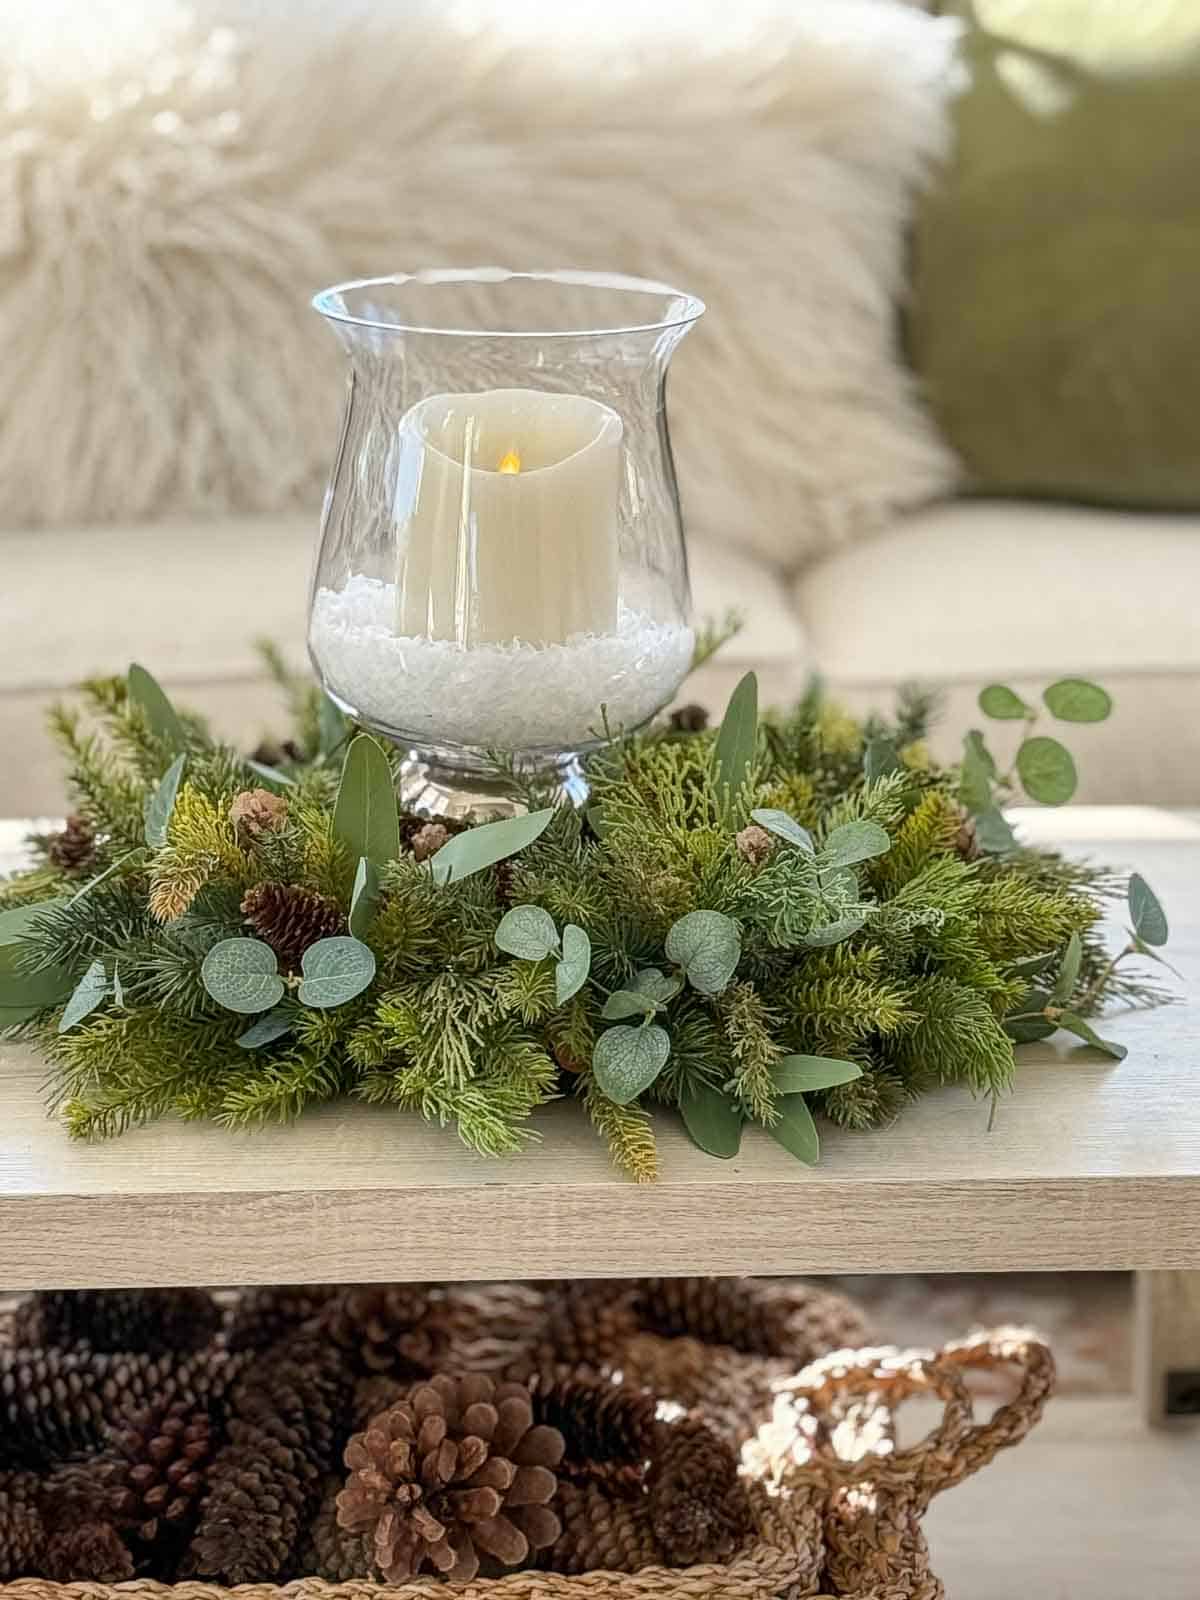
Lay your wreath flat on a table or large tray. It becomes a pretty candle ring that adds Christmas charm to a dining table, kitchen island, or coffee table.
I made this Christmas wreath to work specifically as a candle ring, so I was careful about how I placed the evergreen pieces and greenery to be sure it looked attractive when laid flat. After seeing it finished, I liked it so much on the bookcase that I may make another one for the centerpiece on my sunroom coffee table, and hang this wreath on the bookcase.
Make Smaller Wreaths With Leftover Pieces
Save your leftover greens, leaves, or embellishments. They work beautifully on small wreaths to hang on the back of dining chairs, cabinet doors, or even in a powder room.
Other Helpful Tips For Making A Wreath
These small details can make your wreath look fuller, prettier, and more natural.
Add Greenery At Different Angles
Place pieces of greenery facing slightly up, down, and outward. Mix up the directions. This keeps the wreath from looking flat and gives it a more natural shape.
How To Choose The Right Size Wreath
Choose a wreath that fits the space where it will hang. A front door usually looks best with a wreath between twenty-two and thirty inches. Smaller spaces, like bookcase doors or mirrors, look best with a wreath between fourteen and twenty inches.
Storage Tips To Keep Your Wreath Fresh For Next Year
A few easy ideas will help your wreath keep its shape and look pretty from year to year.
- Store your wreath in a roomy box so the greenery is not crushed.
- Hang your wreath on a hanger and place it on a clothes rack.
- Hang wreaths on a peg or hook on a basement wall.
- Keep wreaths in a spare closet to keep them clean and dust-free.
- Use a large cotton bag to protect the wreath while allowing airflow.
- Place tissue paper between layers of embellishments if the wreath is full or fragile.
I store most of my wreaths in the basement, so I hang them on a peg and cover them with pieces of old cotton sheets. This keeps the dust off and helps the wreaths stay full and fresh-looking from year to year.
Frequently Asked Questions About Making A Wreath
More Christmas Wreath Ideas You Will Like
A few other wreaths on the blog use the same easy idea of starting with simple materials and turning them into something pretty for your home. These are helpful projects to try if you are looking for another Christmas wreath to make this season.
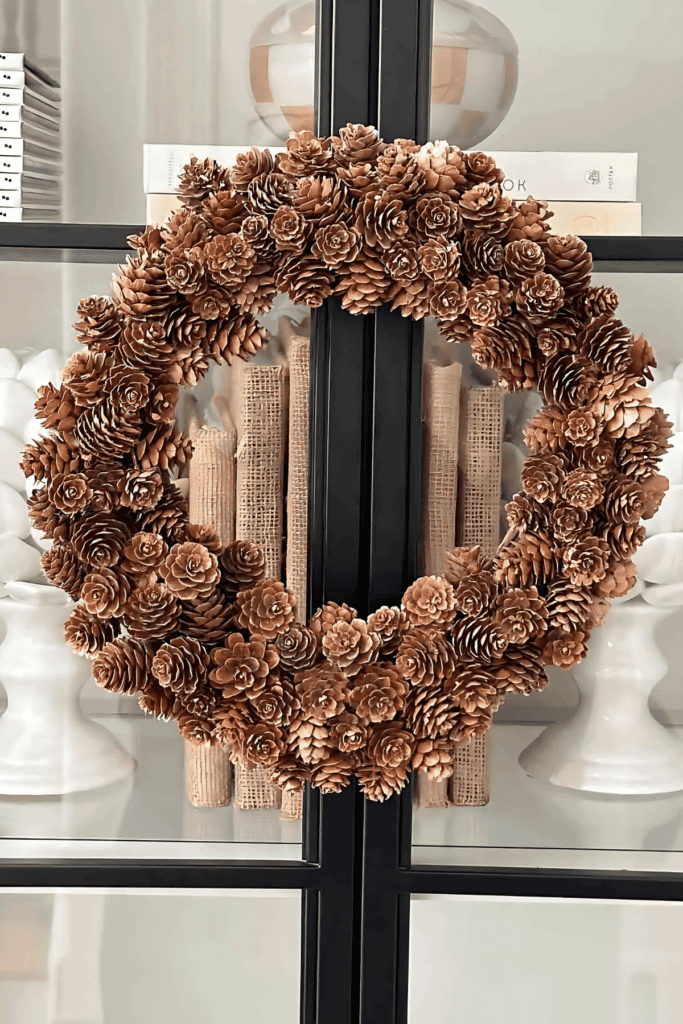
How To Make A Simple And Natural Mini Pinecone Wreath
This little wreath is made with real pinecones and has a pretty natural look. It is easy to make and works almost anywhere in your home, from the back of a chair to a small door or cabinet.
Sweet Gum Ball Wreath: Simple And Textural
If you love decorating with natural things, this wreath is a favorite. It has beautiful texture and is an easy project to make using the seed pods that fall from sweet gum trees.
The Easiest Way To Make A Live Wreath
This older post shows the simple method I have used for years to make a live Christmas wreath. The images are dated, but the steps are quick, helpful, and still the best way I know to make a fresh wreath.
Making a Christmas wreath with things you already have is such an easy and pretty way to add a bit of Christmas to your home. It is also a wonderful way to get in the Christmas spirit. Creating or updating a wreath is simple, relaxing, and so enjoyable. And a handmade wreath makes a lovely gift for someone special. I hope you set aside a little time to refresh a wreath you love and enjoy it all season long.
Yes, mixing real and faux greens works well. Real greens add fragrance and texture, and faux pieces help your wreath keep its shape.
Press each stem deeply into the base and secure it with hot glue. Let the glue cool before moving to the next section so the greens stay put.
Yes, but choose a covered area like a porch or protected entry. This keeps the wreath from fading or losing its shape from wind or rain.
If you are looking for simpler Christmas projects this season, here are a few ideas you might enjoy. These are low- cost, or no-cost projects.
More Christmas DIYs
Chocolate bar marzipan jujubes jelly-o carrot cake caramels. Tootsie roll cookie jujubes powder icing lemon drops. Pastry brownie topping oat cake chocolate cake jelly candy gingerbread tart.


Merry Christmas, friends!


Stunning! Can you provide a link for the bright orange eucalyptus garland?
Hi Teddee, the link is in the area that speaks about the material I used. I hope you give this easy wreath a try!