How To Create A Brambly Christmas Garland
Creating a brambly Christmas garland is an easy way to bring soft holiday beauty into your home. This loose, gathered style always feels warm and welcoming.
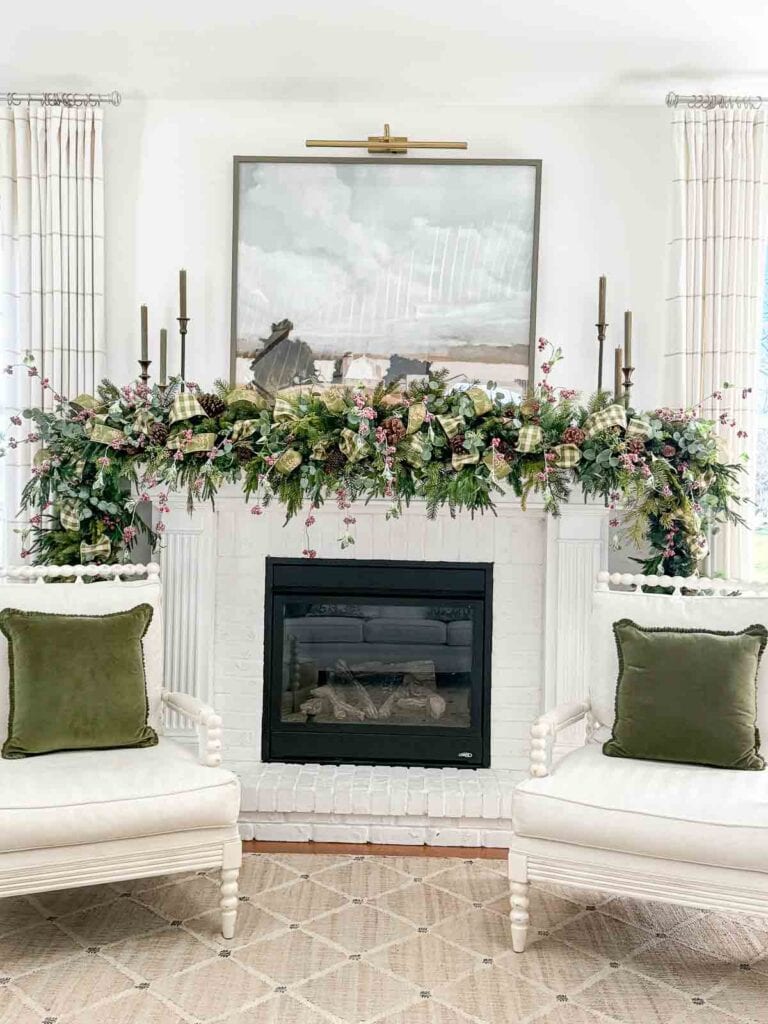
I recently had a few friends over for lunch, and they could not stop talking about the garland on my mantel. They loved the layers of greens, the soft ribbon loops, and the way the berries and pinecones peeked out here and there. Their kind words reminded me just how simple it is to make something pretty that brings joy to others.
This post will show you how to create the same brambly look in your own home. It is an easy, relaxed way to decorate, and once you learn the steps, you can use them year after year.
What Is A Brambly Christmas Garland?
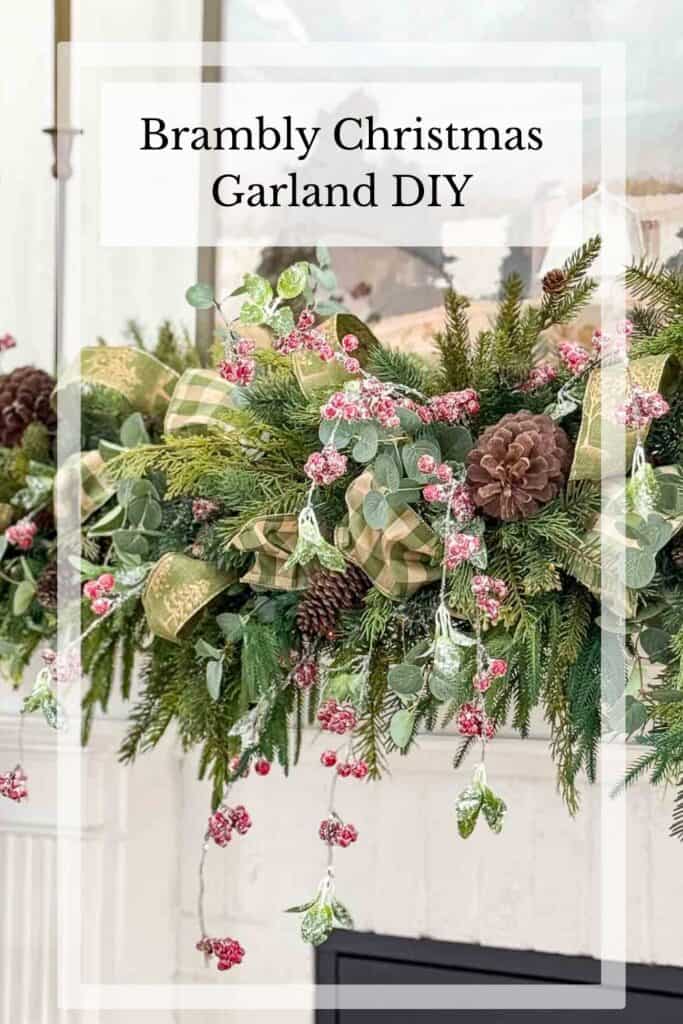
A brambly Christmas garland is a loose, layered holiday garland that looks natural and full of texture. Instead of looking tight or overly styled, it has an airy shape with pieces of greenery and branches that wildly spill out in different directions. This creates a soft, relaxed look that feels both festive and timeless.
This loose, twiggy style is one of my favorites to create because it is the easiest to put together. Every layer builds on the next, and all the greens, branches, berries, and ribbons are simply tucked into the garland. Nothing needs to be glued or wired in place. It has a collected, just gathered feel that works beautifully on a mantel, across a console table, or draped over a mirror or doorway.
Supplies You Will Need To Make This Garland
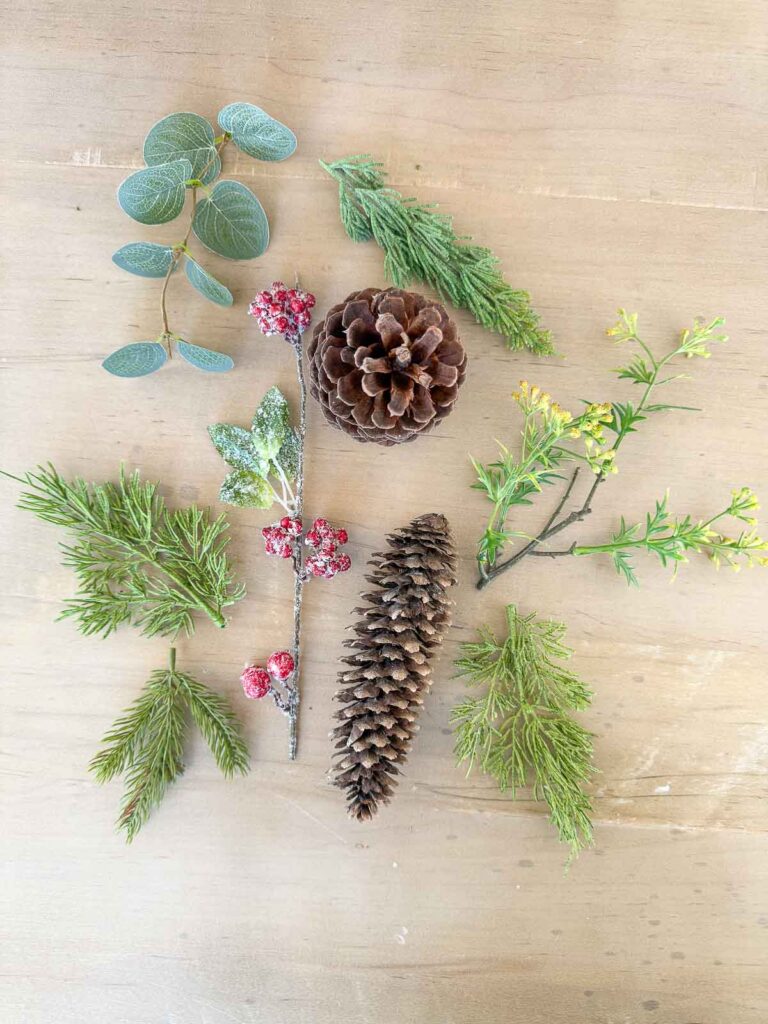
Gather everything before you start. Here is what I used to make this loose, pretty, brambly garland.
- Two pre-lit evergreen garlands, at least as long as your mantel
- Command Garland Straps to secure the garland to the mantel
- Faux evergreen stems for extra fullness
- Smaller bits of mixed evergreens to tuck in here and there
- Faux leafy stems for a different texture and interest
- I used two kinds of eucalyptus for soft shape and color
- Wide ribbon with a pretty pattern that works with your color palette
- Floral wire to pinch and secure the ribbon into loops
- Pinecones or small natural accents
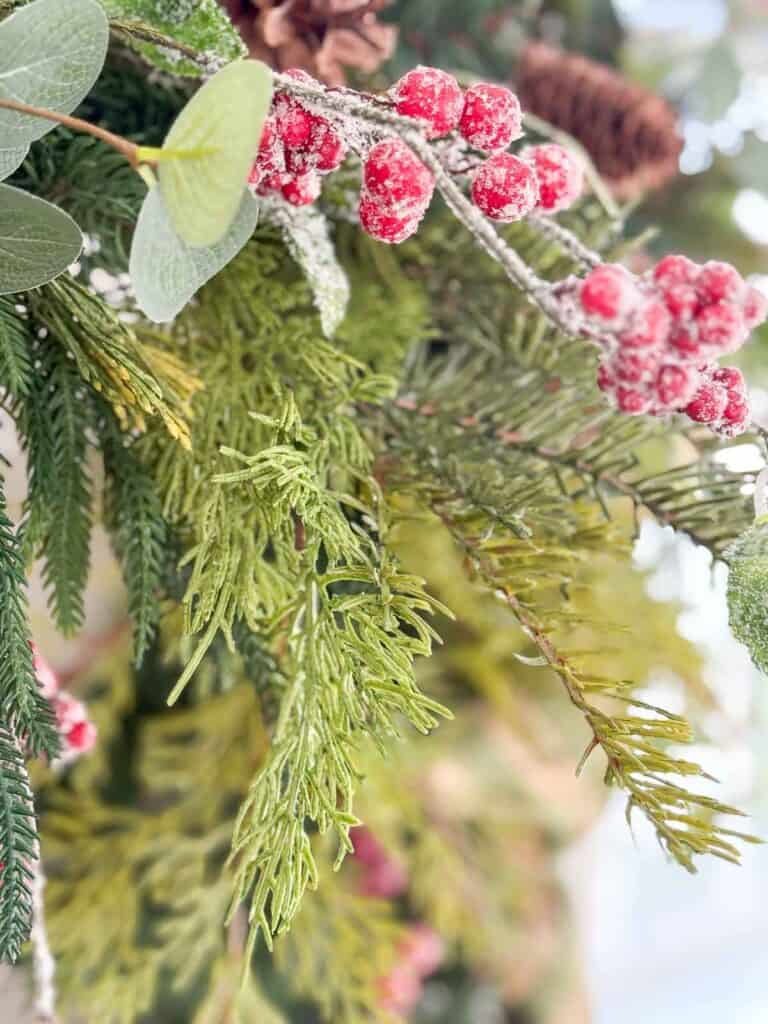
- Long frosted berry stems for a bit of sparkle and texture
- Wire cutters for trimming stems
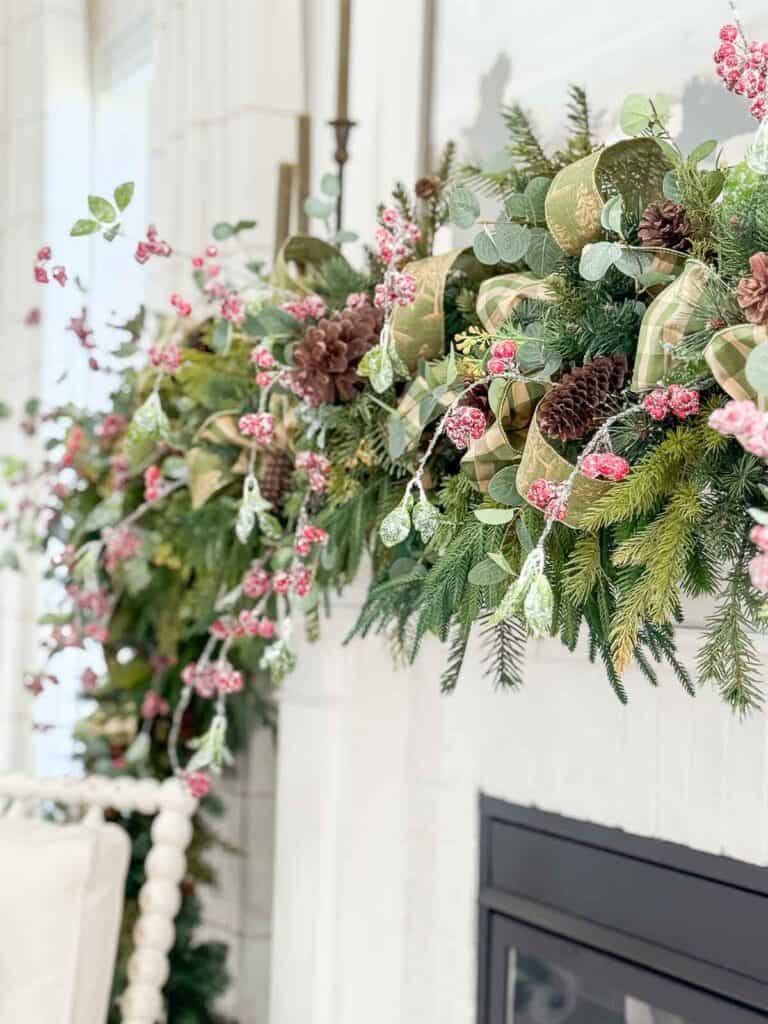
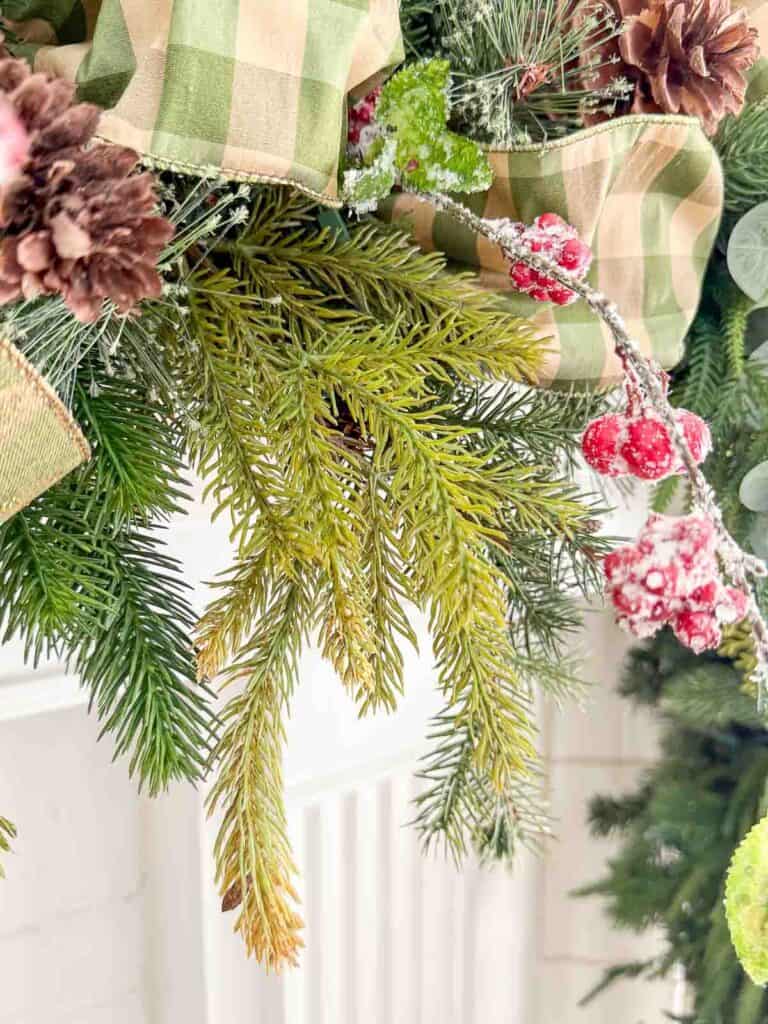
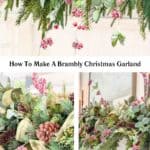
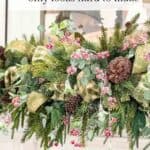
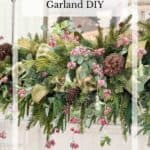
These images show the mix of greens, ribbon loops, and berry stems that create the brambly look. The long branches, soft eucalyptus, and trailing frosted berries give the garland its loose, natural shape.
Choose Faux Greens That Look Natural
A brambly garland starts with good faux greens. Look for stems with a natural shape that mix well together. Choosing the right greens makes this garland full, soft, and beautifully gathered.
Here are a few things to look for when picking faux greens:
- A natural shape with branches that bend and move a little
- A mix of longer and shorter stems for fullness and texture
- Greens that look like their natural counterparts, with believable leaves and needles
- A realistic color, not too bright or too dark
- A variety of greens, like evergreen, soft leafy stems, and eucalyptus
Eucalyptus stems are a favorite of mine because they lighten up the garland and add a soft drape. Using two kinds brings a nice variety and gentle color changes.
If you want help choosing good faux greens, visit Tips For Using Faux Greens At Christmas, where I share the simple things that make faux greens look real.
Prepare The Base Of The Garland And Making Loops
Doubling the garlands gives you a fuller base and a nice amount of lights running through the whole length. I placed both garlands on a utility table to twist them together. Doing this on the mantel can feel a bit cumbersome, and the table makes the job simple and easy to manage.
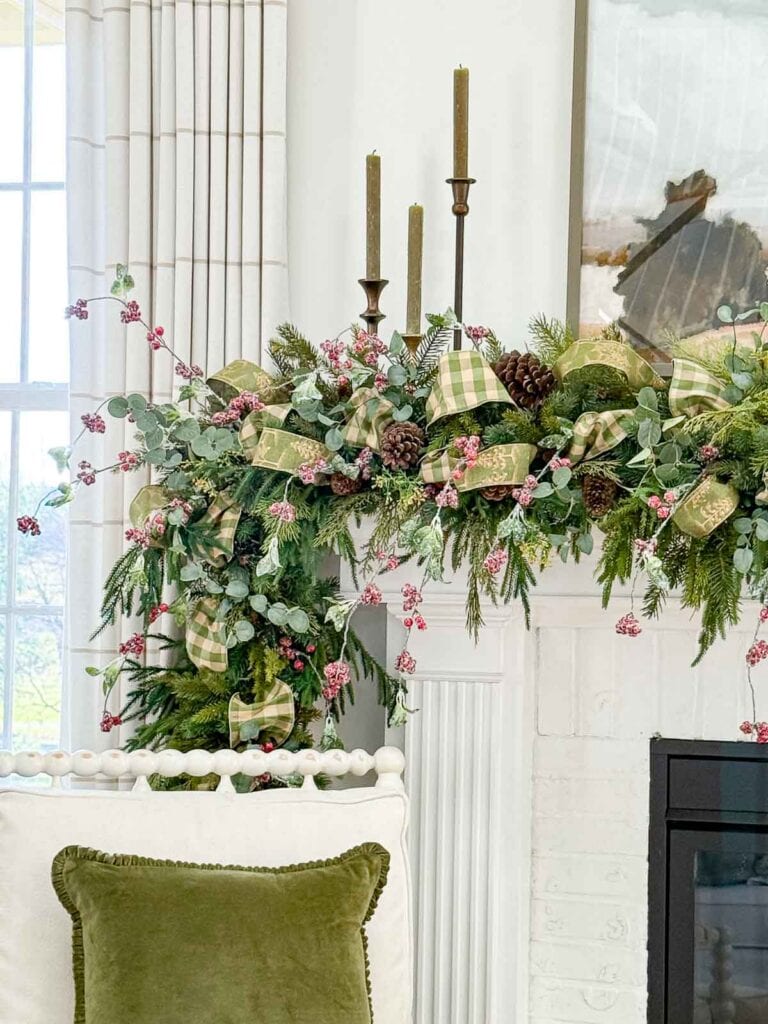
While the garlands were on the table, I added a base layer of buffalo check ribbon loops. I cut the ribbon into two-and-a-half-foot lengths and cut one-foot pieces of floral wire. Then I pinched the ribbon at one-foot intervals and wired each pinch to hold the shape. After that, I wired the ribbon to the garland, creating loose loops that sit softly atop the greens.
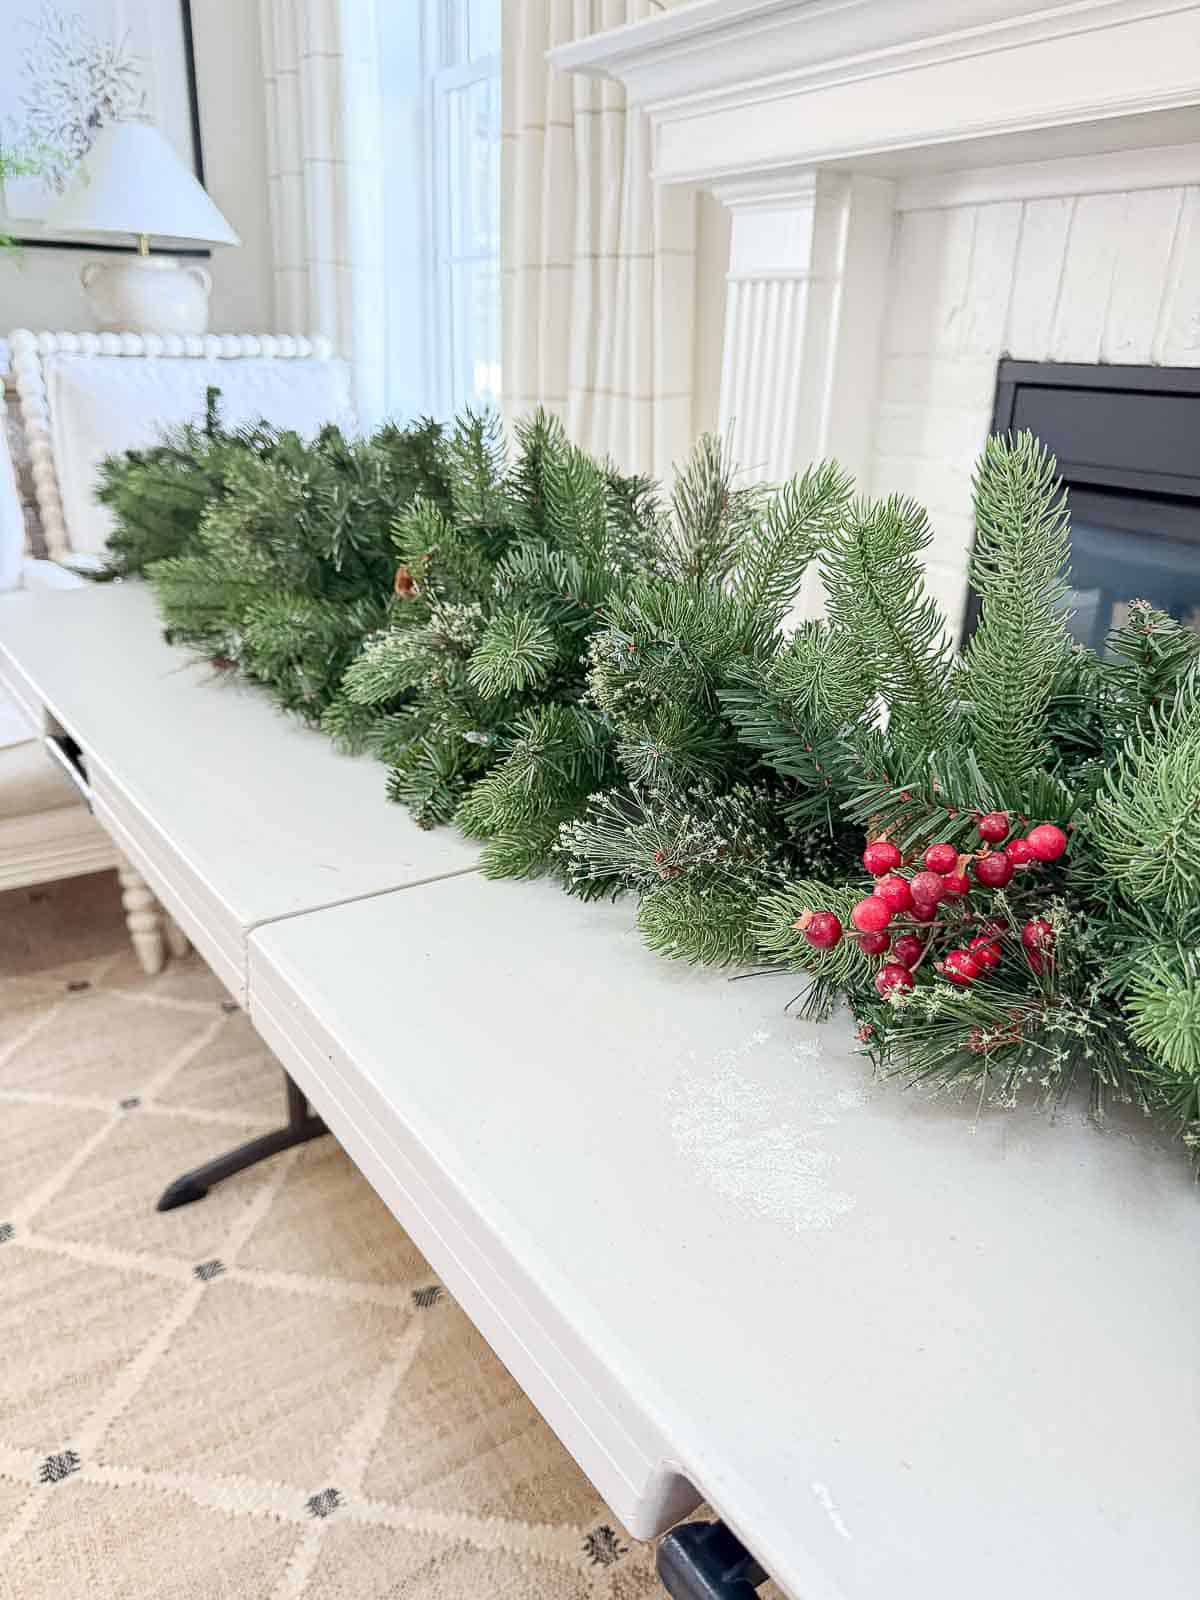

Once the ribbon loops were secured, I moved the garland to the mantel and clipped it into place with Command Garland Holders spaced along the top edge. They hold everything snugly and come off cleanly after Christmas.
Securing the base garland first makes the rest of the process go smoothly. You can tuck in evergreen bits and pieces without shifting anything you already styled. And when the season is over, the garland pulls apart easily, and all the little stems and accents can be saved to use again next year.
Layer In More Greenery To Create A Full Brambly Look
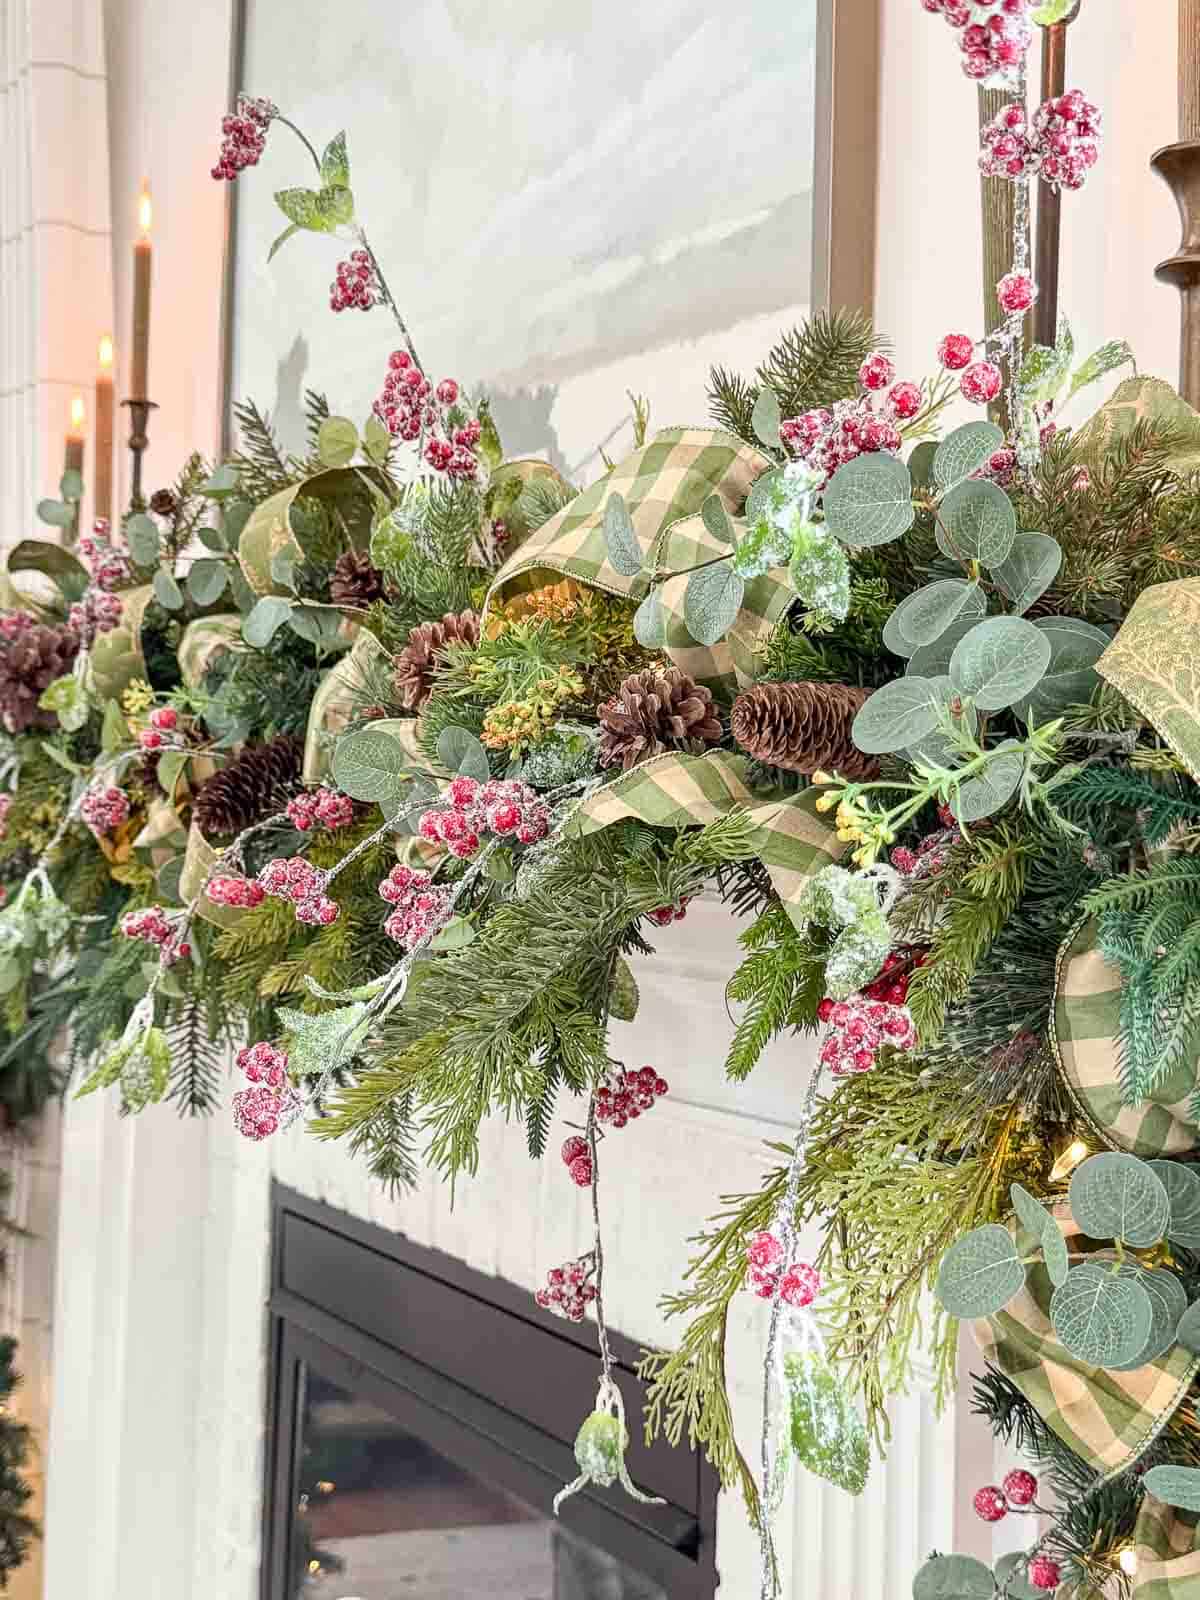
Once the base garland is secure, start adding longer evergreen stems. Place them in the general direction you want the garland to flow. This helps create that loose, gathered look that makes a brambly garland so pretty. Tuck the stems into the garland firmly, letting some pieces trail a little for a natural shape.
Next, add smaller bits of evergreen here and there to fill in open spots. Mixing different kinds of evergreens gives the garland soft movement and gentle texture. Work slowly, stepping back now and then to see where you might want a little more fullness. This is an easy and forgiving process, and each layer helps the garland come to life.
Pro Mantel Tip
Let evergreen stems drip gently over the edge of the mantel. I used faux Cyprus greens for this and then layered other greens and leafy stems over them for a full, natural look.
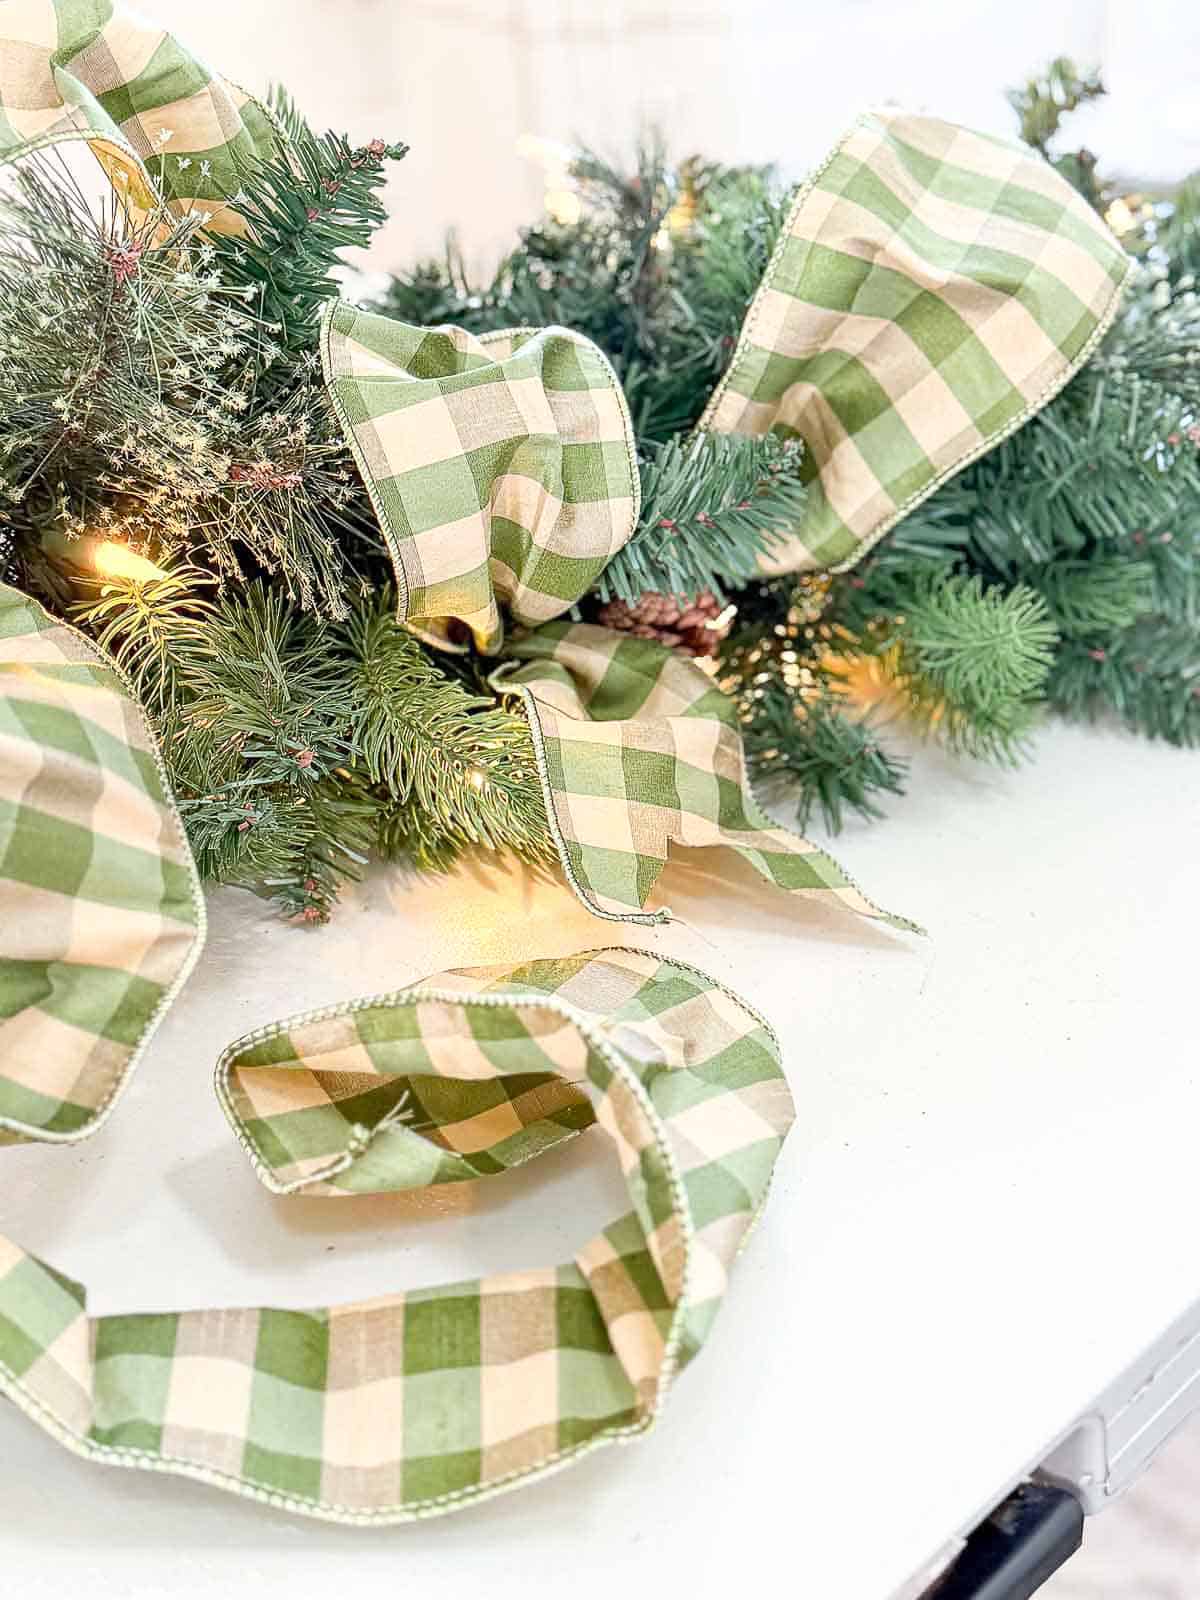
Add More Ribbon Loops To The Garland
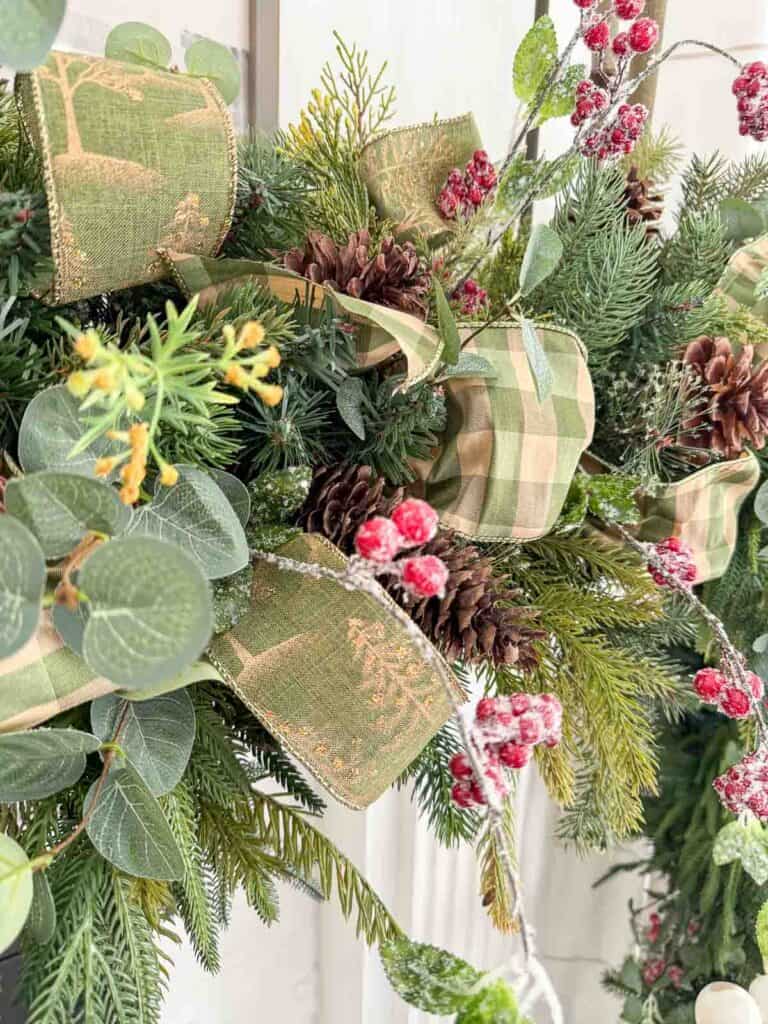
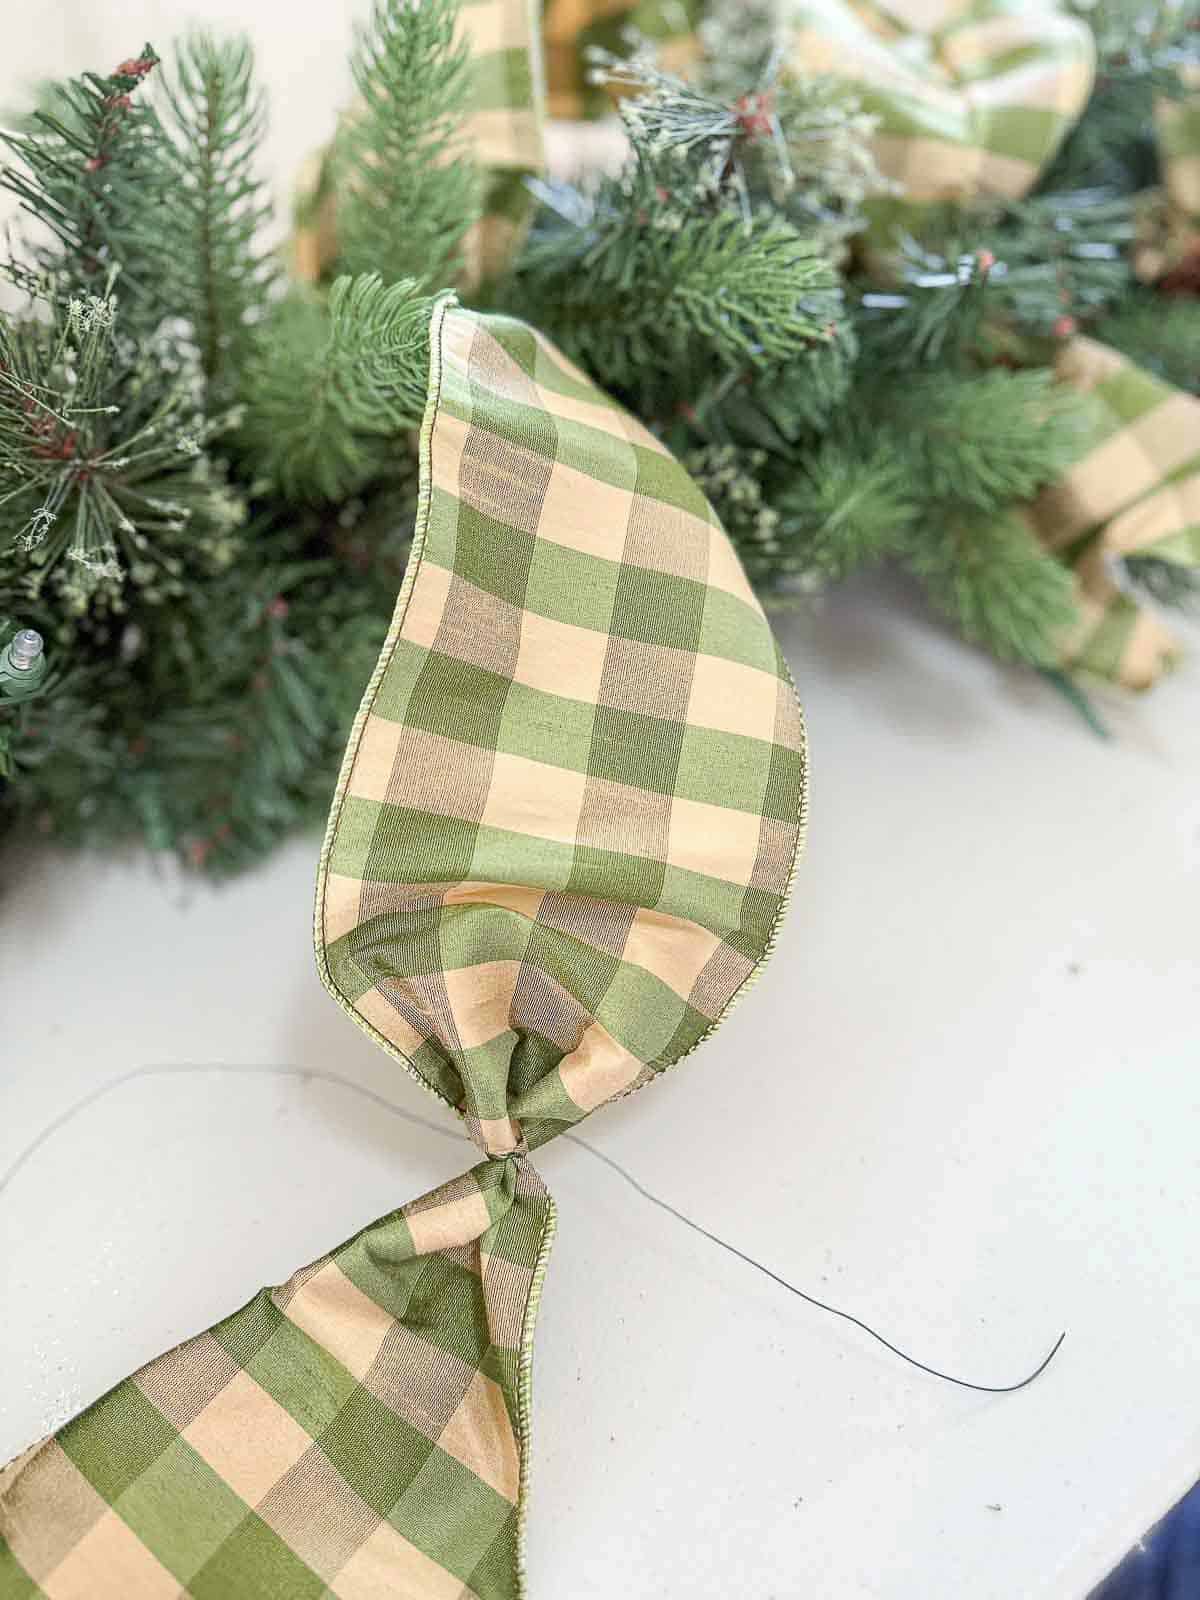
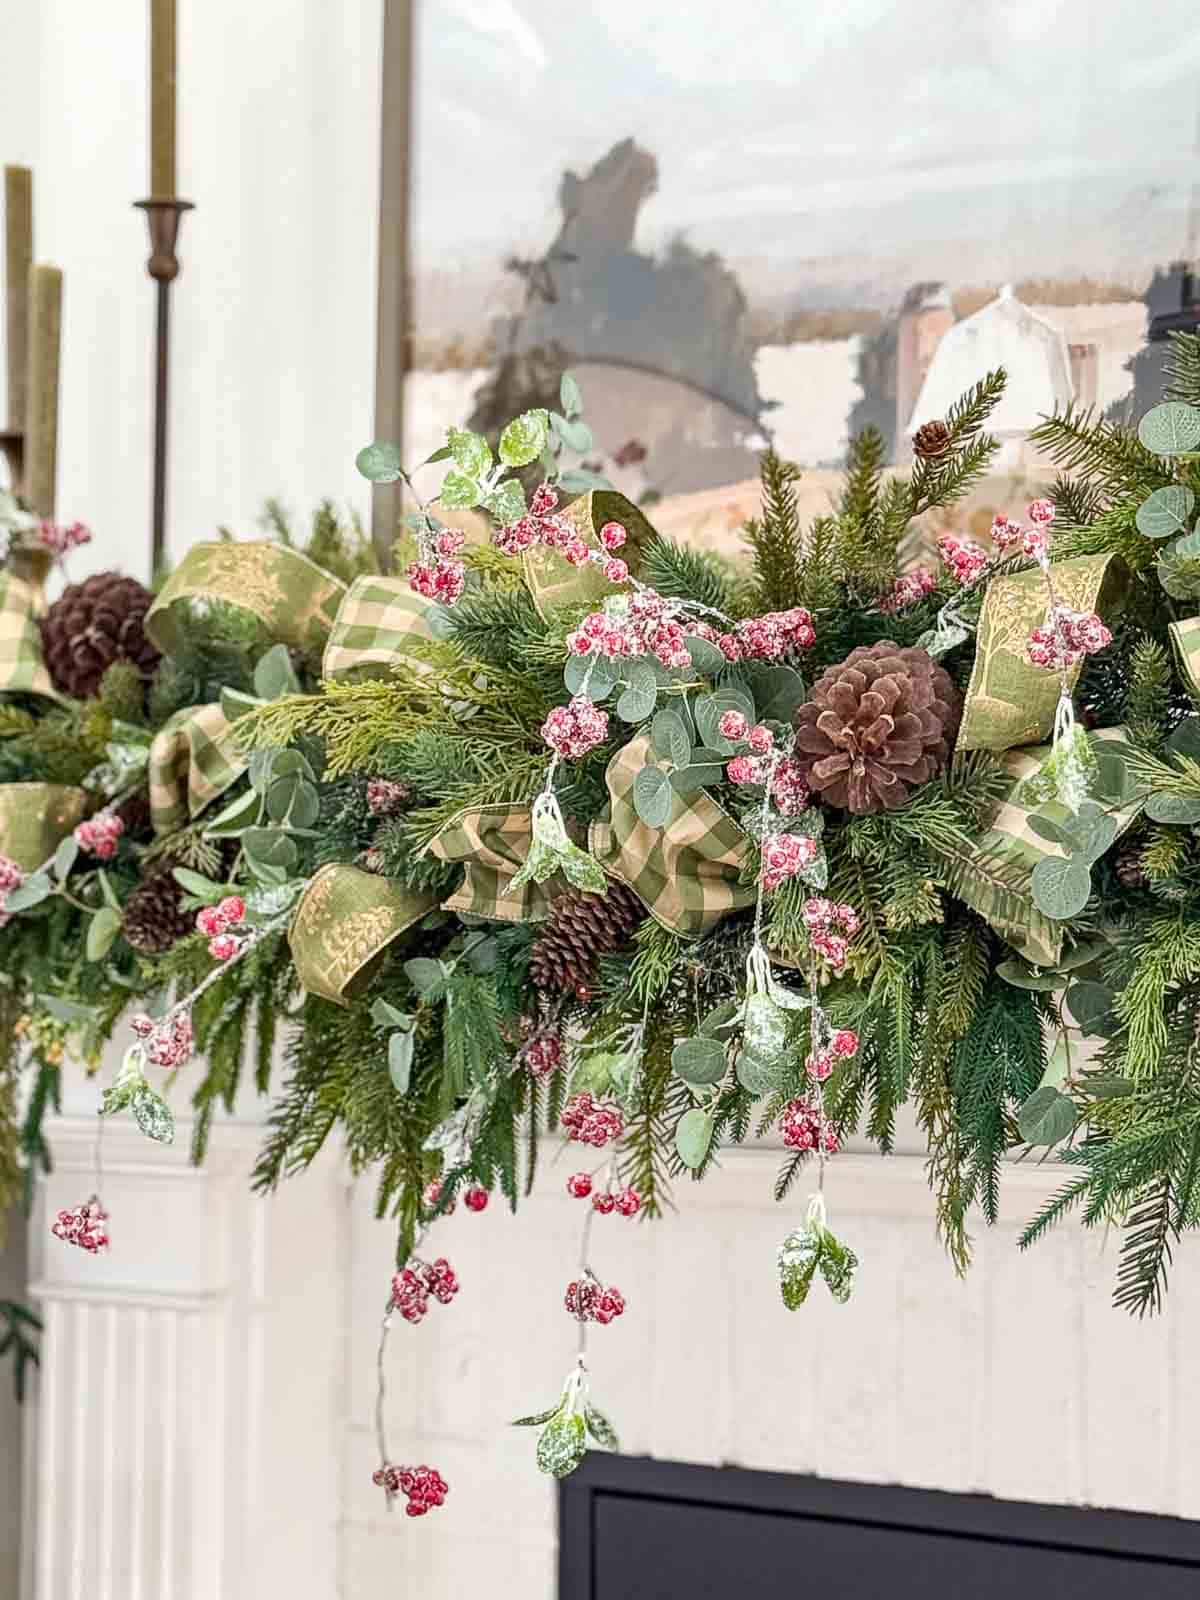
After most of the greenery is in place, it is time to add the ribbon. Cut generous lengths, about 2 feet long, of ribbon and pinch the center and tie with floral wire.
Tuck one end of the ribbon into the branches, then tuck the wired, pinched area into a soft loop. I like to cut French tails on the other end of the ribbon and let them peek out here and there. Add the ribbon so it looks random and natural, not too planned. Let a few loops sit deeper in the garland and a few rest closer to the top. The ribbon adds warmth and gentle movement, and it breaks up all the green in the best way.
Pro Tip
Do not worry if the ribbon loops are not perfect. I like when the loops face different directions and some look fuller than others. This gives the garland a natural, brambly look and keeps it from feeling too planned.
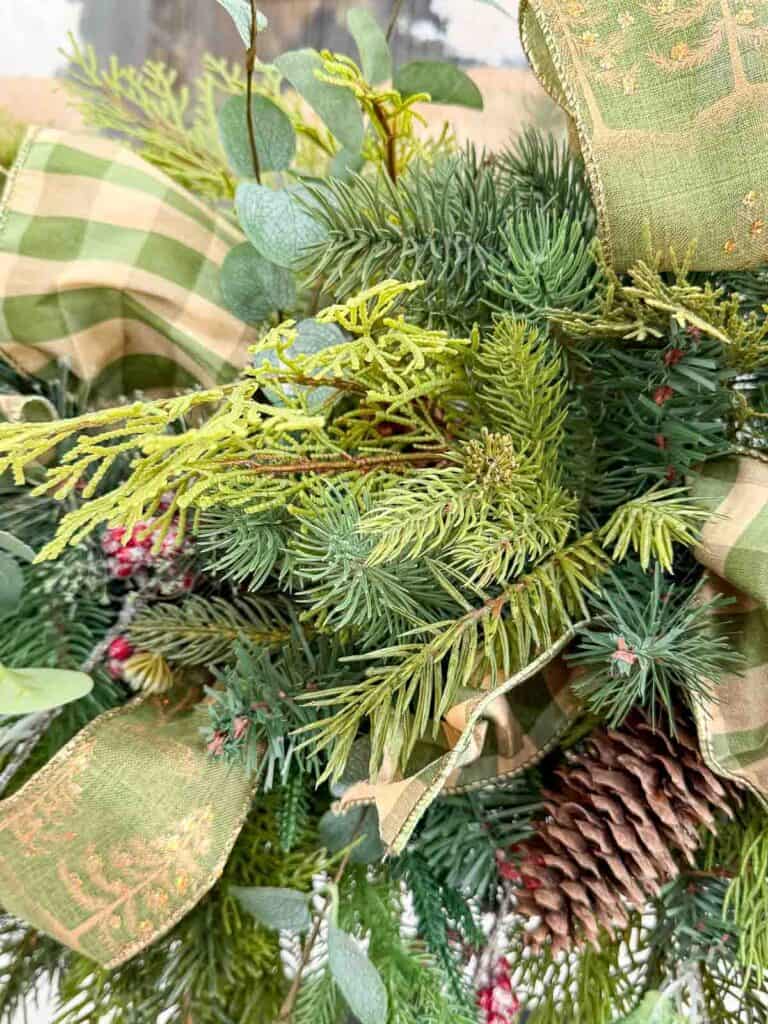
Tuck Pinecones Into The Garland
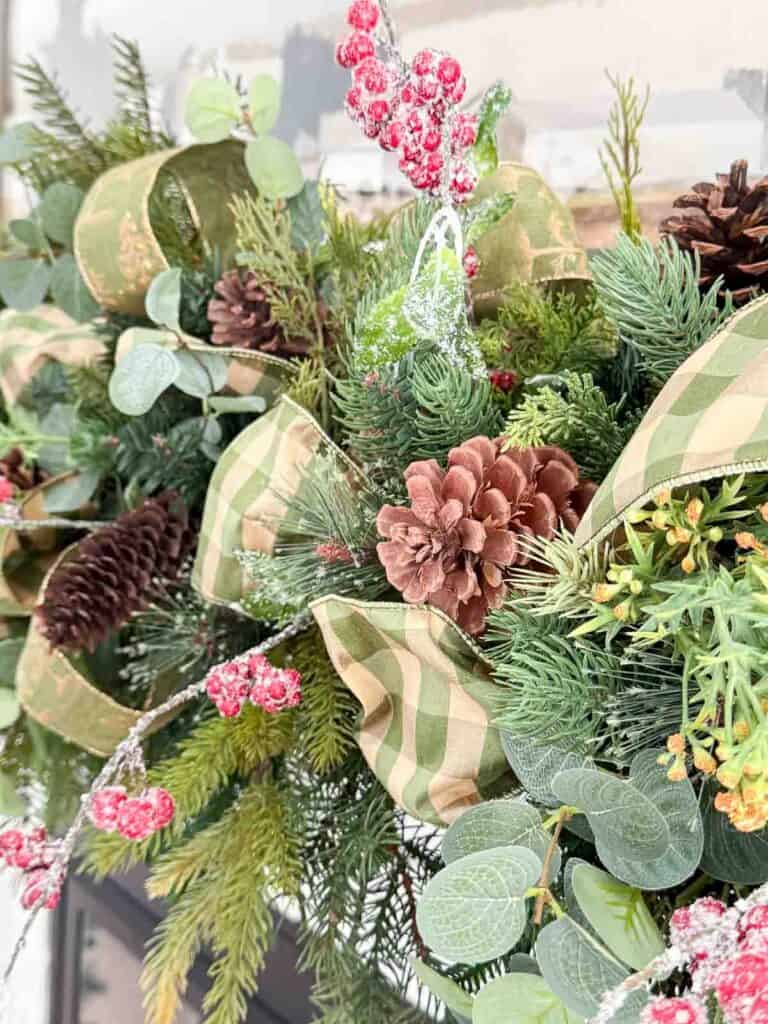
Pinecones add a little texture and a natural touch to this brambly garland. Tuck them in after the ribbon loops are in place and before you add the last of the berry stems. This helps the pinecones sit nicely between the layers so they look like part of the garland, not an add-on.
Nestle the pinecones into the branches, turning each one until it feels secure. Let a few sit deeper in the garland and a few rest closer to the top. They soften the space between the ribbon and berries and give the garland a warm, gathered look.
Pro Garland Tip
Try tucking a few pinecones in backward so the bottom is showing. The pattern on the base of a pinecone is beautiful, and it adds an interesting bit of texture to the garland.
I love pinecones, so I used them generously.
Add Eucalyptus Leaves And Berry Stems
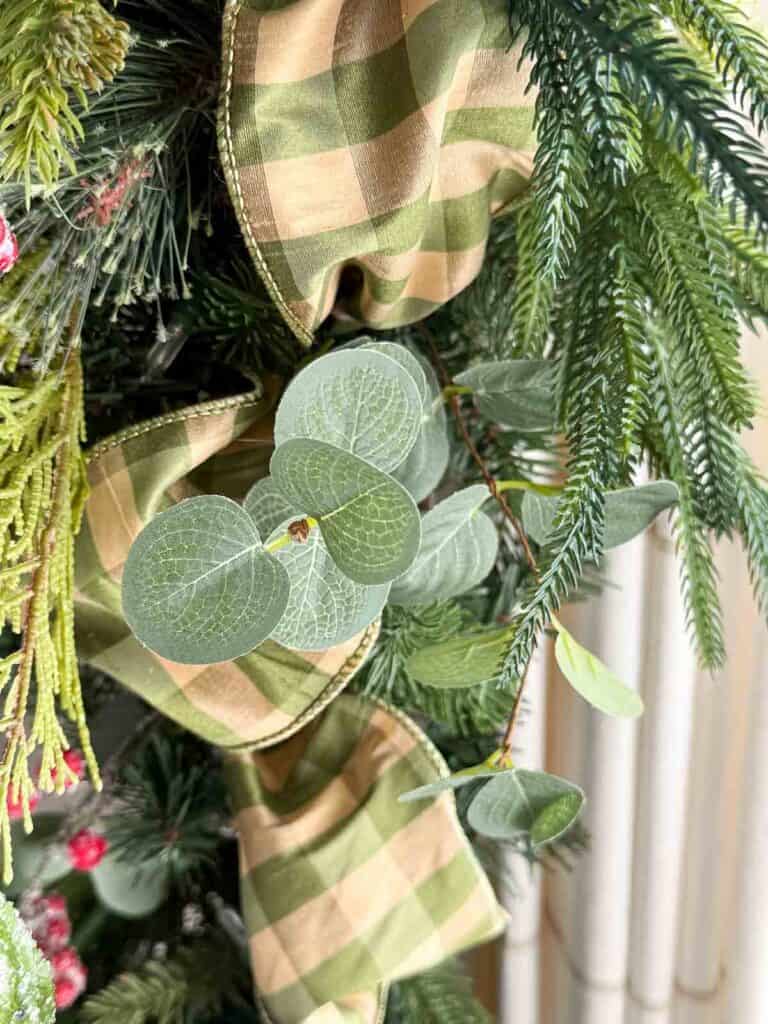
Now it is time to add the softer, more colorful layers. Tuck eucalyptus stems into the garland, spacing them so they feel light and natural. I used two kinds of eucalyptus because each one has a different shape and color. They help break up all the deep green and give the garland a pretty, gathered look.
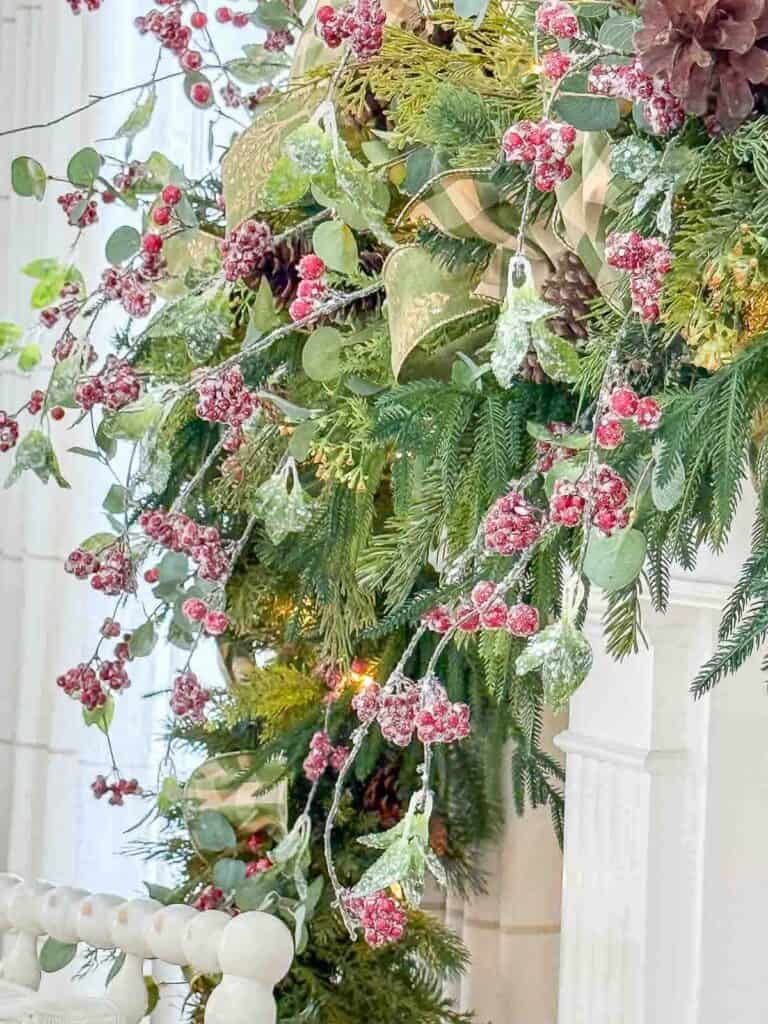
Next, add the long frosted berry stems. Let them trail out a bit to keep the garland loose and brambly. The berries add gentle color and a touch of sparkle. Step back now and then to see where you might want another bit of eucalyptus or an extra berry stem.
Look Over Your Garland And Make Adjustments
When the garland is finished, take a few minutes to look it over. Gently move a stem here or there, tuck in an extra bit of greenery, or adjust a ribbon loop. This brambly style is very forgiving, and a few small touches can make the whole garland look even more gathered and natural.
Step back and check it from different angles. Look for open spots that might need a little fullness or places where you want a bit more ribbon or a berry stem. These tiny edits help blend all the layers and give the garland a pretty, finished look without overworking it.
Where To Use A Brambly Garland In Your Home
Because this style has so much texture and movement, it adds warmth to both simple and more decorated spaces. Use it anywhere you want a pretty, natural layer of Christmas greenery.
A brambly garland works almost anywhere in your home. Its loose, gathered look makes it easy to style and gives any space a soft holiday look. Drape it across a mantel, lay it along the center of a console table, or let it trail across the top of a buffet. It also looks lovely over a mirror, around artwork, or framing a doorway.
A brambly Christmas garland is such a simple way to add soft, gathered beauty to your home for the holiday season. This loose, natural style is easy to put together, and every layer adds its own charm. Use this stunning garland on a mantel, over artwork, or across a console table; it brings warmth and texture to any room.
I hope you try making your own brambly garland this year. It is easy, forgiving, and fun to put together. And the best part is that you can use your stems and accents again next Christmas. Enjoy making something pretty for your home.
Frequently Asked Questions About How To Make A Christmas Garland
Start by twisting two garlands together. Doubling them adds instant fullness and gives you more area to tuck stems into. Then layer in a mix of long evergreen stems, small bits of greenery, and a few leafy stems to add texture. Finishing with ribbon loops or berry stems helps the garland look rich and intentional, even if the base garlands were inexpensive.
Use outdoor safe garlands and stems, and secure everything well with floral wire or outdoor-rated hooks. Add weather-friendly ribbon and accents that can handle moisture and wind. Outdoor garlands look best with simple layers and a few larger pieces that can be seen from a distance.
Tuck each stem securely into the base garland so it sits between the branches. The pre-lit garlands hold most stems in place without glue. For a banister, you may want a small dab of hot glue or wire to secure every item in place.
Yes, you can tuck in a few real evergreen stems for scent and texture. Just remember they will dry faster than the faux greens.
Choose a garland at least as long as the surface you are decorating. A little extra length lets you add a soft drape or trail pieces over the edges.
Happy Christmas decorating, friend…


Absolutely gorgeous. Can’t wait to try it. Can you please tell me where you got the faux frosted berry stems?
Hi Lynndy Lu, I found them at Hobby Lobby, but I could not find the same ones online to source for you. Hope you can find some at your local store.
Thank you so much for this tutorial. I love how yours turned out. Just beautiful!
Thank you Ashley.
Just what I was hoping to do in my color palette. Thank you, thank you! I have been looking online for ideas, and of course, yours are the best!
Aren’t you sweet, Lorraine! I’m so glad you found something you can use in your Christmas home.
Your Brambly is sooo beautiful. Do you have a source to buy the base. I find so many garlands seem rally stiff or rubbery.
Linda, the base garland is very old. It’s no longer in stock.