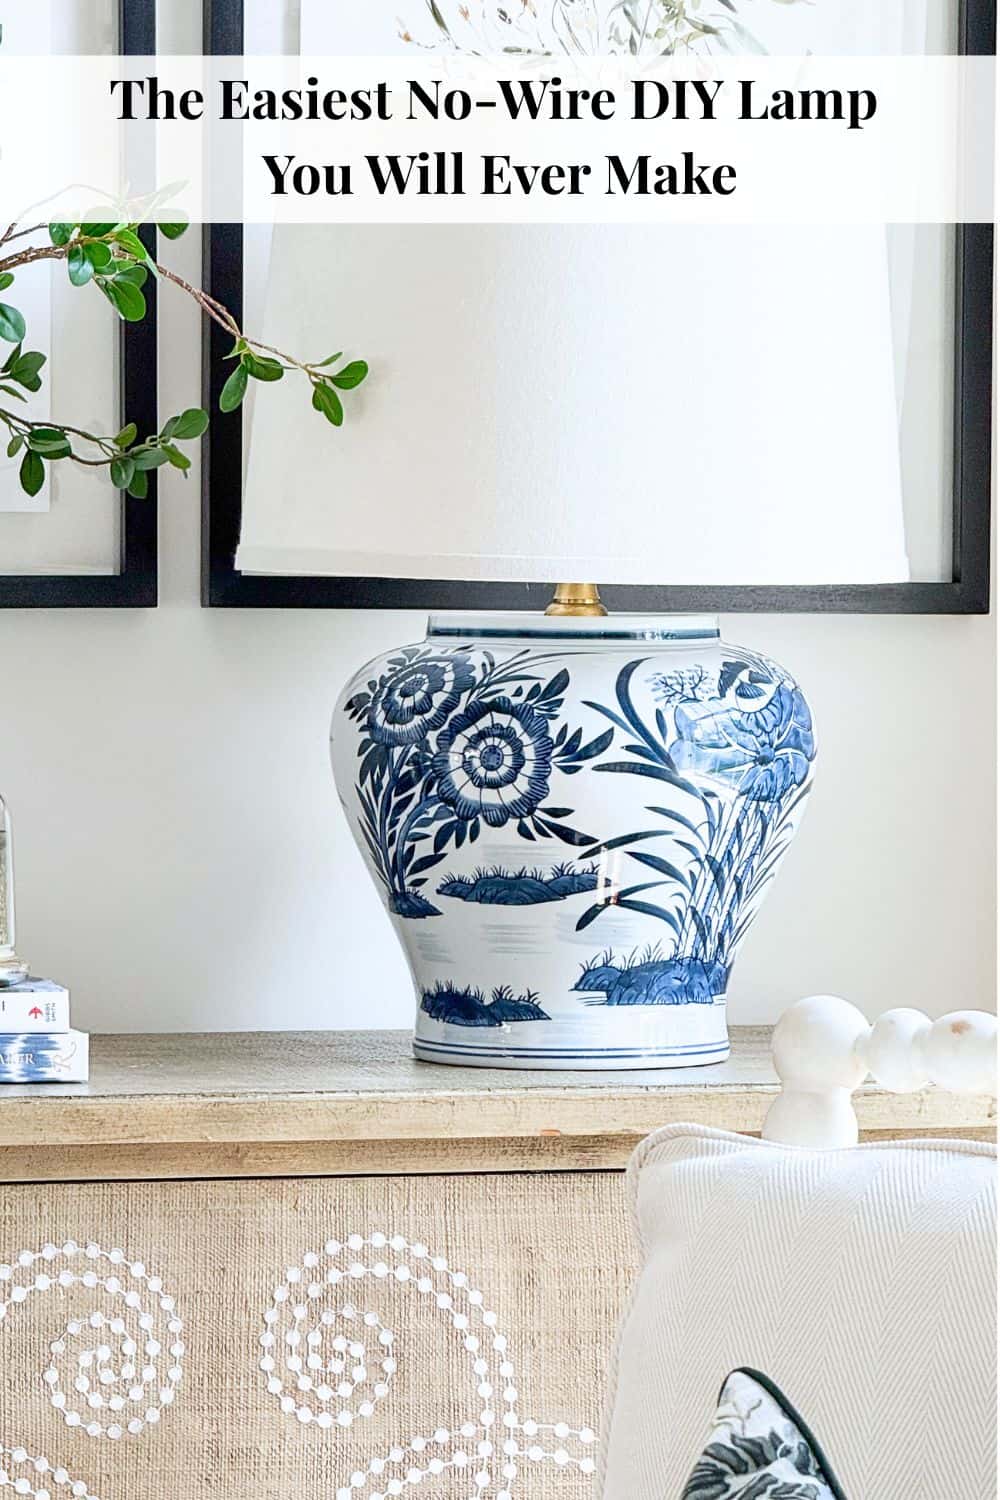
How to Make a DIY Lamp From a Ginger Jar With No Wiring
Learn how to make a beautiful DIY ginger jar lamp using a candlestick, puck light, and old lampshade. No wiring, no tools, and no fuss required.
This post may contain affiliate links. See my disclosure statement for details.

🌿 QUICK START: You only need four things to make this lamp: a ginger jar, a candlestick, a puck light, and a lampshade. No wiring, no tools, no fuss. Just stack, style, and switch on.
Have you ever seen something on Instagram and thought, I have to try that? That is exactly what happened when I spotted a ginger jar lamp in my feed one afternoon. I instantly loved it and knew I had to give it a go right here at Tanglewood House.
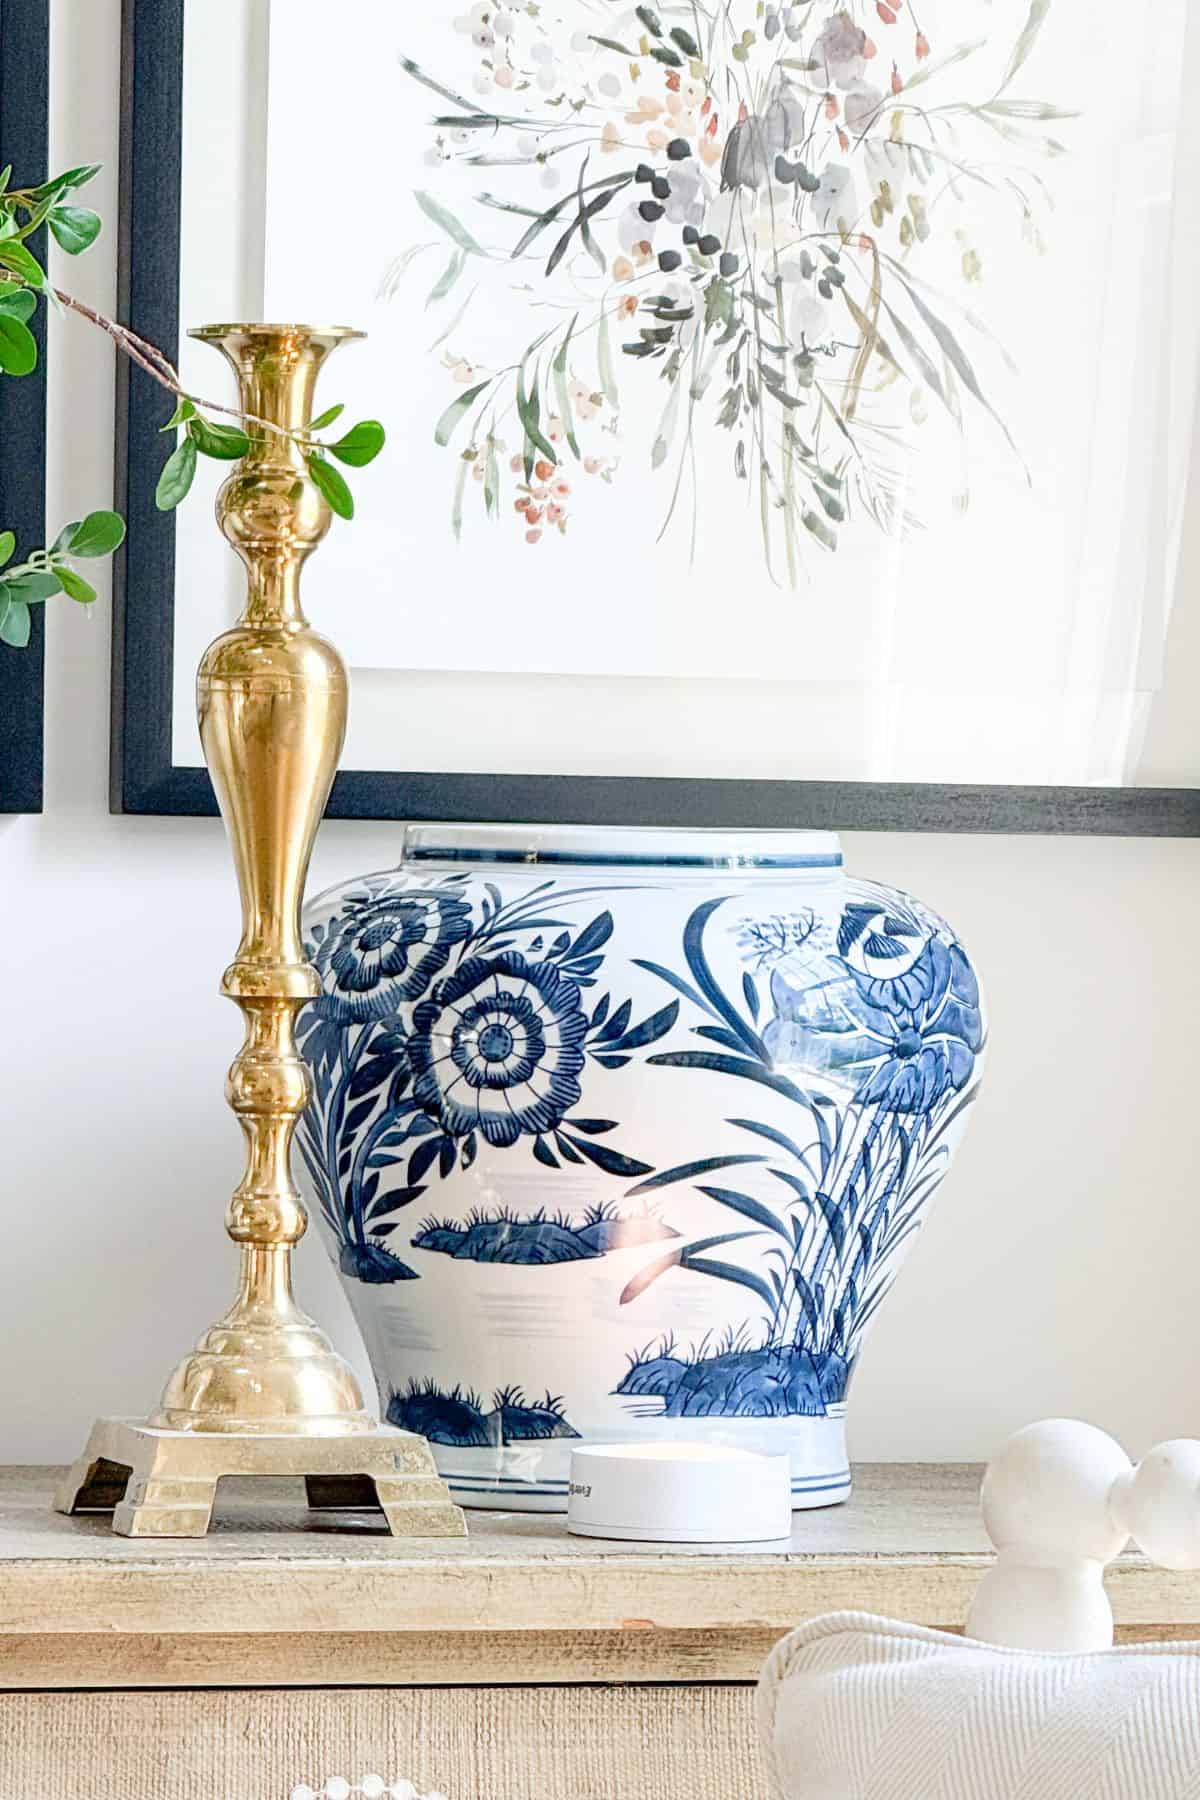
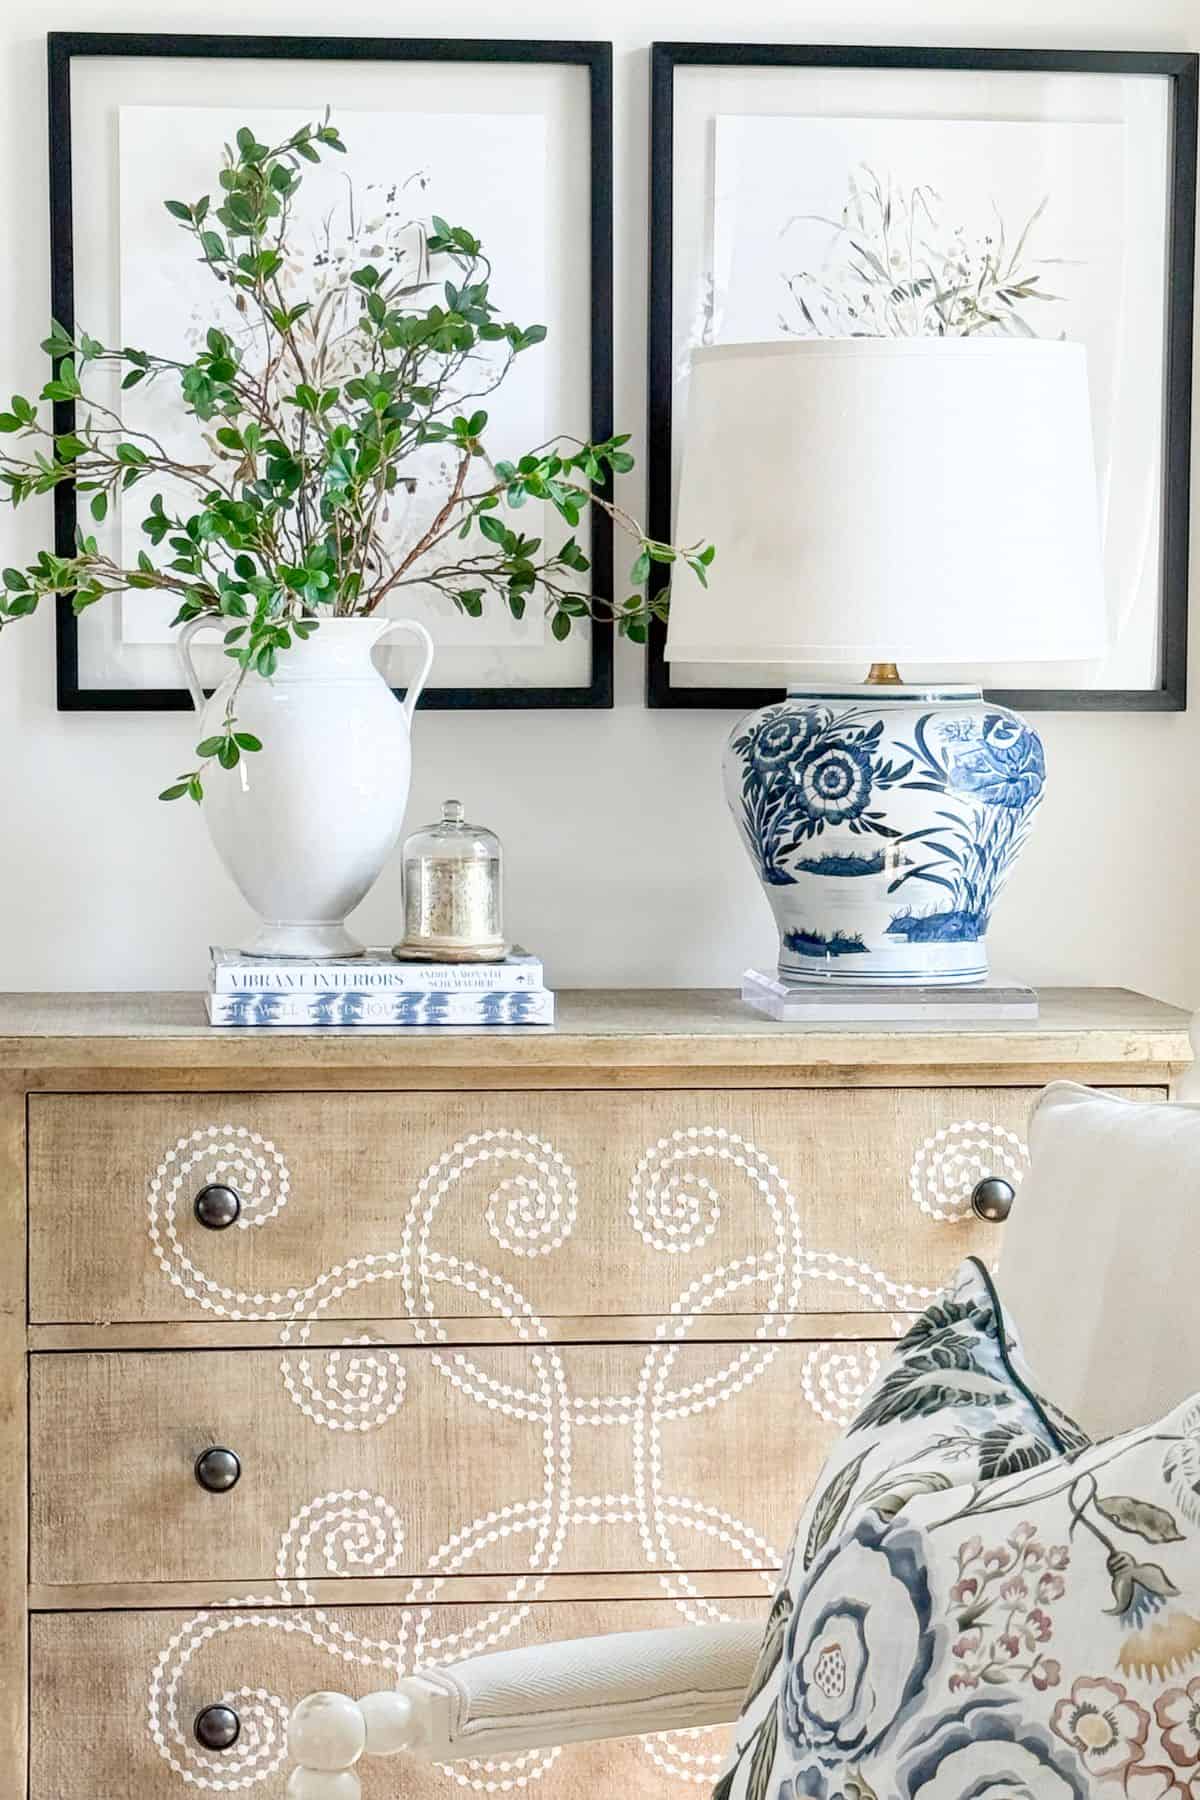
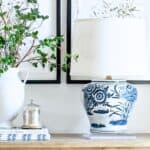
I had just gotten a large chinoiserie jar and hoped I could find a candlestick in the basement that would work with it. What I found was even better. Tucked away downstairs was a pair of solid brass candlesticks my father brought home from a remote assignment in Japan, where he was stationed during the Cuban Missile Crisis. They are just beautiful, and I love that they now have a new life in our living room.
A couple of lampshades later, also from the basement, and this lamp was born. I may look for a new shade eventually, but it looks perfectly fine for now. And the best part is, I did not attach anything. No glue, no wiring, no tools. Just stack and style. It has lived as a lamp in our living room and has been fine.
What You Need to Make a DIY Ginger Jar Lamp
One of the things I love most about this project is how simple the materials list is. You likely already have some of these tucked away, just waiting for a new purpose.
- A ginger jar or any large ceramic jar with a wide, stable opening
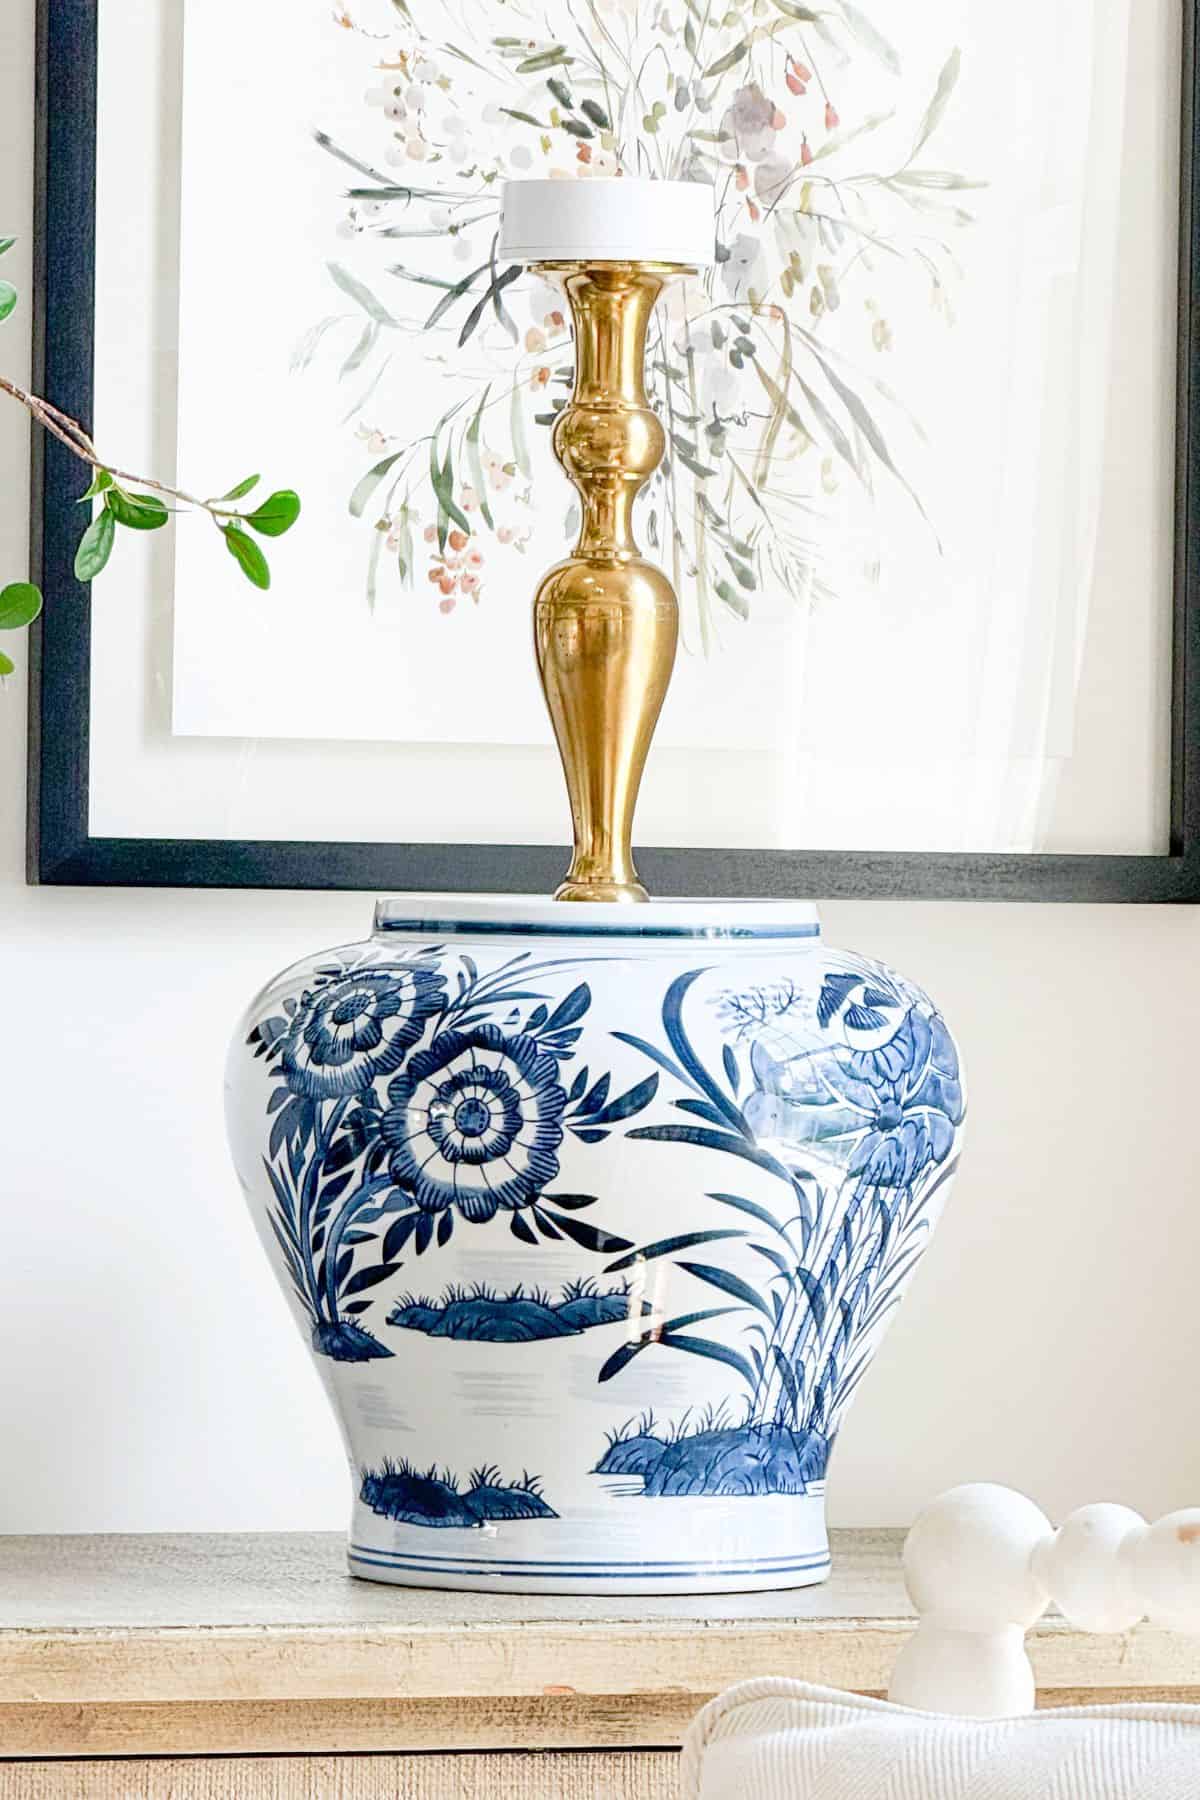
- A candlestick tall enough to rise above the jar (brass works beautifully)
- A puck light that fits snugly on top of the candlestick- I used these with 3 light types and a remote.
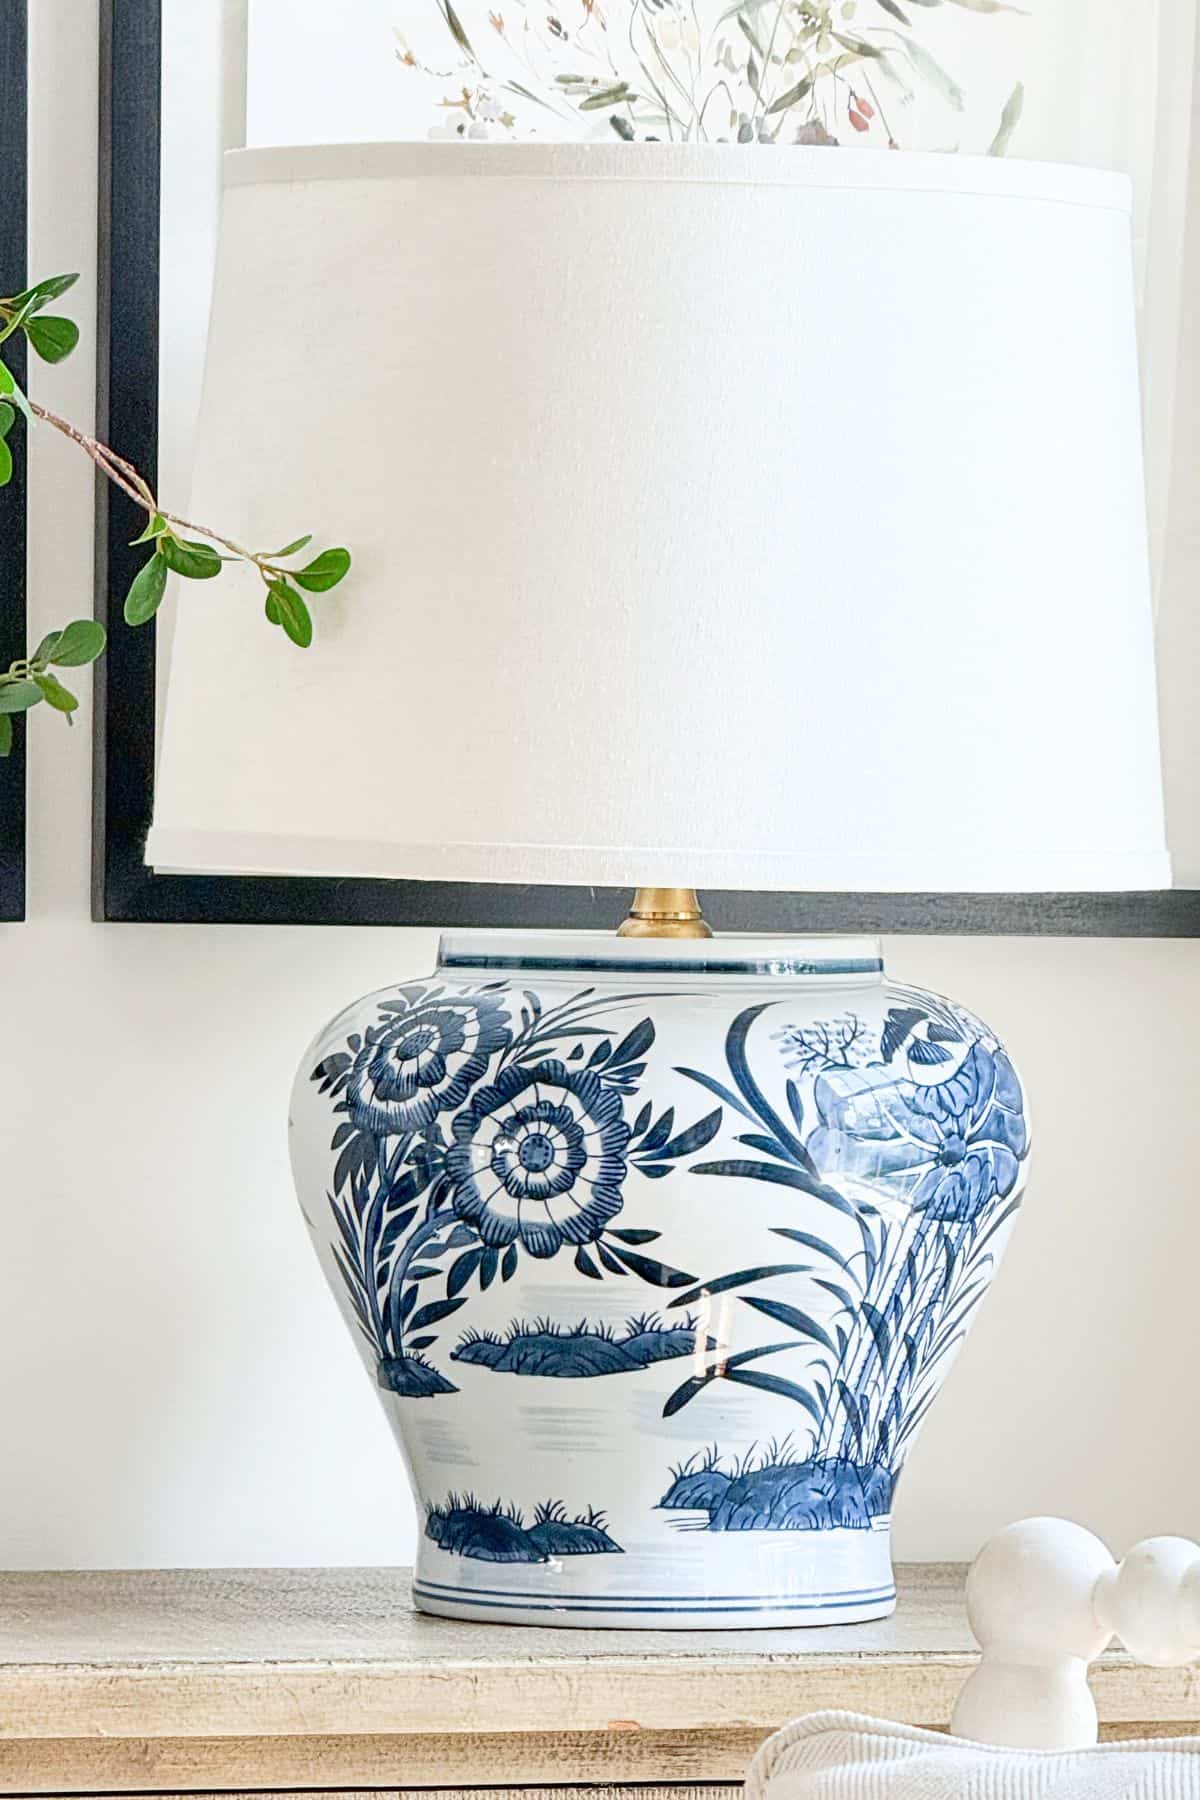
- A lampshade that rests over the puck light
🌿 TIP BOX: The key to this lamp is proportion. Your candlestick should be tall enough to clear the top of the jar so the lampshade sits at a natural lamp height. A shade that is too small or too large will throw off the whole look, so try a few before you commit. A spider fitter shade will sit most securely on the puck light. That’s why I’ll probably get a new lampshade.
That is truly it. No wiring, no lamp kit, no drill. Just four pieces that work together beautifully when the proportions are right.
How to Make a DIY Ginger Jar Lamp
This is genuinely one of the easiest DIY projects I have ever done. There is no wiring, no special tools, and nothing is permanently attached. Here is all you do:
- Place your ginger jar on a stable, flat surface like a console table, dresser, or sideboard.
- Set the candlestick inside the opening of the jar. You want it to stand upright and feel stable. A candlestick that is too narrow will wobble, so test a few if you have them.
- Place the puck light on top of the candlestick. The puck light usually comes with a round sticky pad that can be adhered to the back of the puck, and to the candlestick. The puck should sit flat and steady on the top of the candlestick cup.
- Rest the lampshade over the puck light. Center it as best you can and step back to check the proportions.
- Turn on the puck light with the remote control and enjoy your new lamp!
🌿 TIP BOX: Puck lights come in warm and cool tones. Choose a warm white bulb to give your lamp that soft, cozy glow that looks so good in a living room. Most puck lights are remote controlled or tap to turn on, which makes this lamp surprisingly practical too.
That is it. Five steps and you have a lamp that looks like it belongs in a designer living room. Nobody has to know how easy it was.
How to Adjust the Height of Your DIY Lamp
If your lamp feels a little low for the space, there are two easy ways to give it a lift.
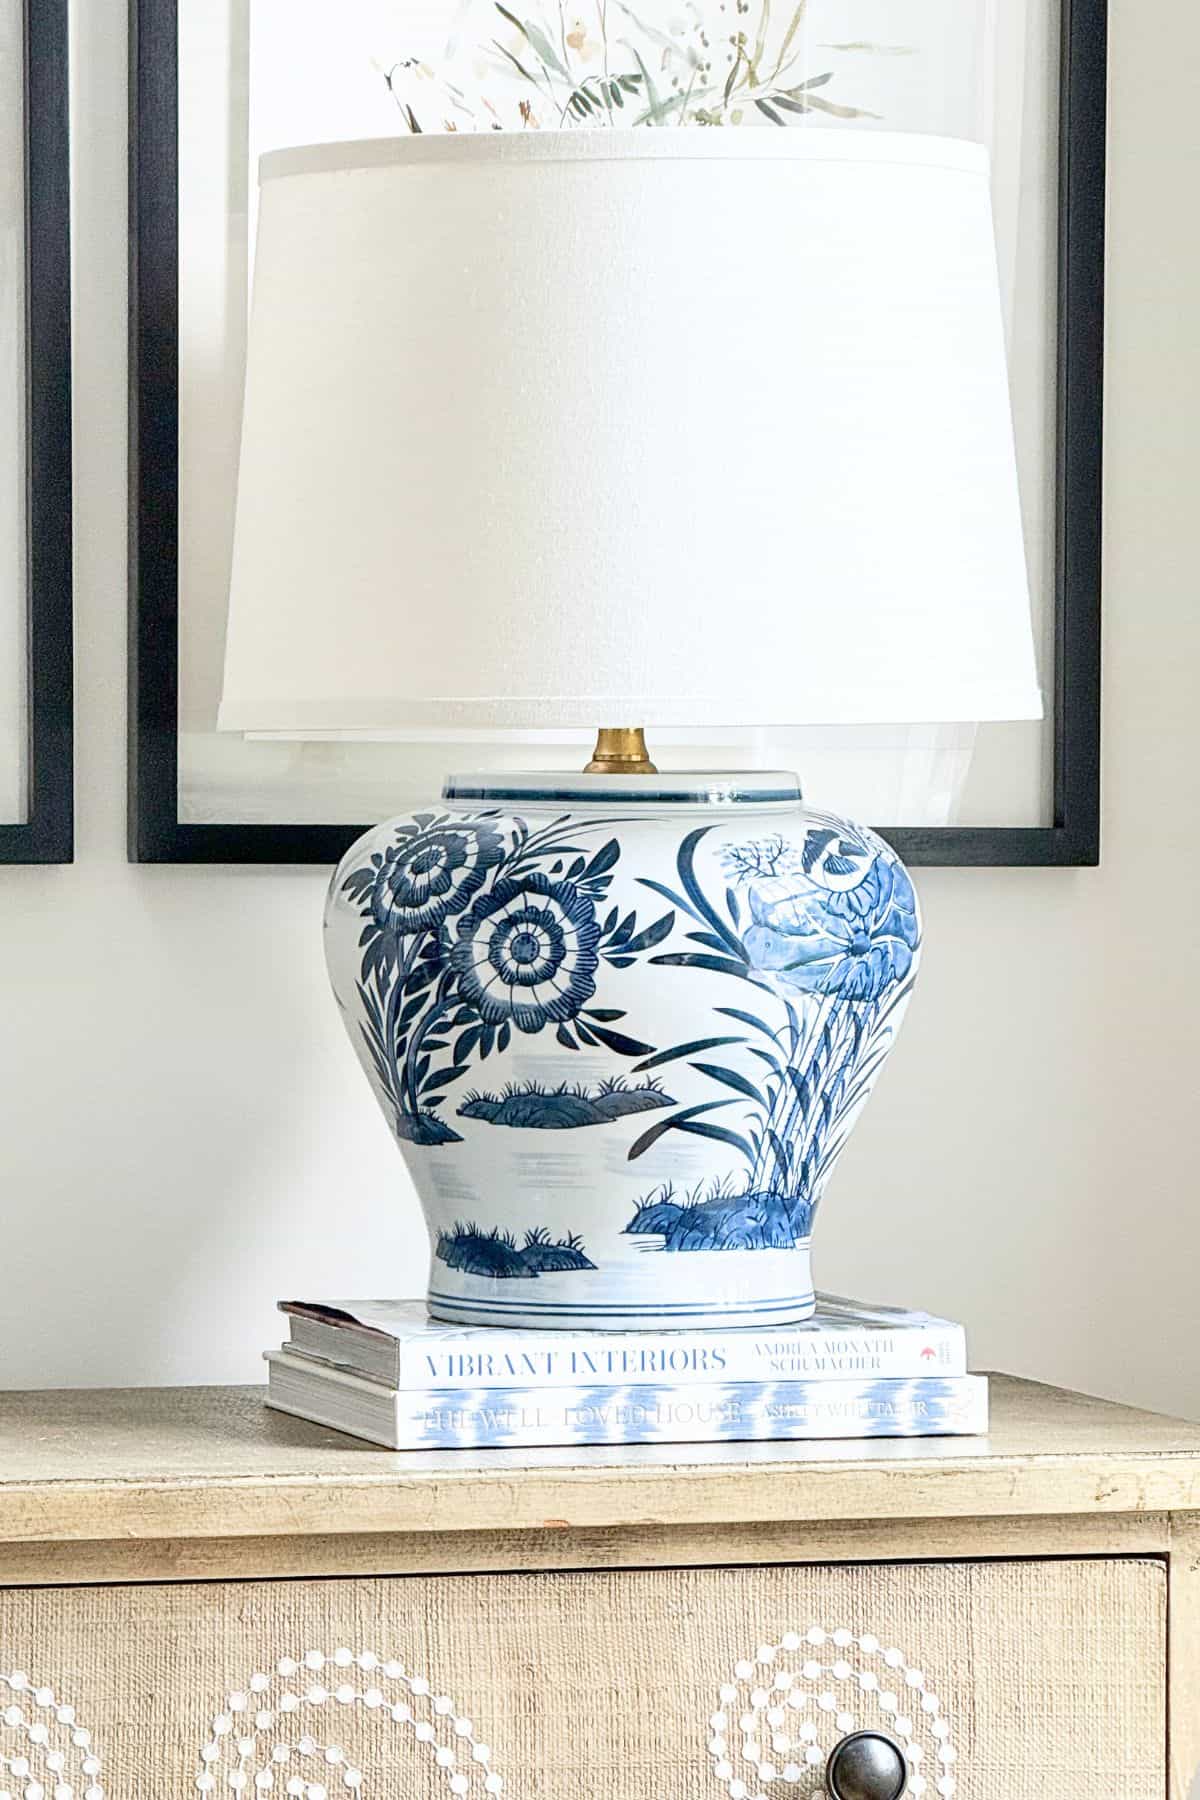
Stack one or two coffee table books underneath the jar. Choose books with spines that complement the colors in your jar. Blue and white books look especially beautiful under a chinoiserie jar. It adds a little personality and a designer touch at the same time.
An acrylic riser is another great option. It gives your lamp a clean, invisible boost and works with any style of jar or room.
🌿 TIP BOX: A lamp should be roughly at eye level when you are seated nearby. If your lamp feels too low in the room, try a riser or a stack of books before you go shopping for a taller candlestick.
Shop Ginger Jars For Your DIY Lamp

Fequently Asked Questions About Making A Ginger Jar Lamp
You can, but size matters for proportion. A larger jar will need a taller candlestick to bring the lampshade up to a natural lamp height. A smaller jar works beautifully on a nightstand or side table with a petite shade.
Look for a puck light with a warm white glow. Many come with a remote control or a simple tap on/off feature, which makes this lamp very practical for everyday use.
Not at all. That is the beauty of this project. Everything simply stacks and rests in place. You can easily swap out pieces any time you want a new look.
Home decor stores, antique shops, thrift stores, and online retailers are all great sources. You do not need to spend a lot. A beautiful jar at any price point will work perfectly. I found the one I used in this post on Amazon.
A shade that is roughly the same width as the widest part of your jar tends to look the most balanced. When in doubt, go slightly wider rather than smaller.
Absolutely! Any stable ceramic jar, vase, or urn with a wide enough opening to hold a candlestick upright will work beautifully.
Give It a Try!

This little lamp project is proof that some of the best ideas come from scrolling Instagram at just the right moment. If you have a ginger jar, a candlestick, a puck light, and an old lampshade hiding somewhere in your home, you already have everything you need. Give it a try and see what you come up with. I think you will love how it looks.
And remember, nothing is permanent here. You can swap the jar, change the shade, or try a different candlestick any time you like. That is the real beauty of this project. It can changes right along with the changes you make in your home.
Happy decorating, friend…
Simply genius!! I love it Yvonne 💕